Chapter 35. Production drawings
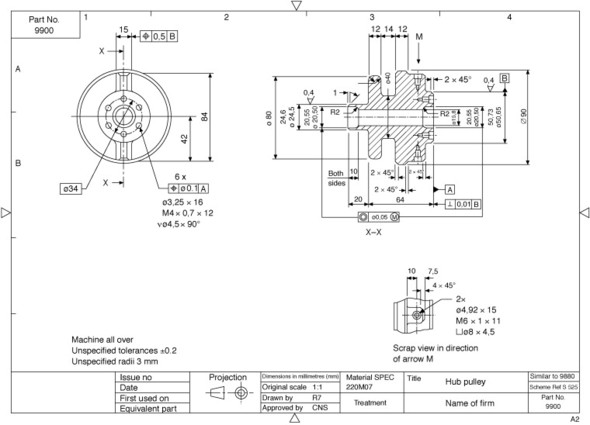
The following three typical drawings are included as examples of draughtsmanship, layout, dimensioning, and tolerancing.
Figures 35.1 and 35.2 show a pulley and a shaft, and illustrate some aspects of general dimensioning and tolerancing.
Fig. 35.1

Fig. 35.2

Figure 35.3 shows a partly dimensioned elevation and plan view of a proposed gear-box cover, with a wide application of theoretically exact boxed dimensioning and the associated positional tolerances. To emphasize this style of dimensioning, other dimensions ...
Get Manual of Engineering Drawing, 3rd Edition now with the O’Reilly learning platform.
O’Reilly members experience books, live events, courses curated by job role, and more from O’Reilly and nearly 200 top publishers.

