The DataList Control
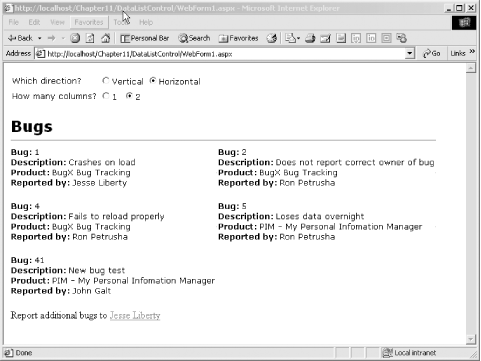
The DataList control is very similar to the Repeater control. In fact, you can render exactly the same output using exactly the same controls, changing only the Repeater to a DataList control. If you examine Table 13-1, however, you will see that the DataList control provides support for column and flow layout. To see how this works, you’ll add radio buttons to offer the user the choice of vertical vs. horizontal flow, and one vs. two columns, as shown in Figure 13-2.

Figure 13-2. DataList with flow control
To create this page, you will modify the previous .aspx page and change the Repeater to a DataList, changing its name from Repeater1 to DataList1:
<asp:DataList ID="DataList1" Runat="server">
You’ll also need to modify the end tag by changing:
</asp:Repeater>
to:
</asp:DataList>
The template for the DataList is identical; no changes are needed at all! You will want to add RadioButtons, however, to allow the user to specify the direction the items will flow, and number of columns:
<table> <tr> <td class="item">Which direction?</td> <td class="item" colspan="2"> <asp:RadioButton ID="Vertical" GroupName="Direction" Runat="server" AutoPostBack="True" Checked="True" />Vertical</td> <td class="item" colspan="2"> <asp:RadioButton ID="Horizontal" GroupName="Direction" Runat="server" AutoPostBack="True" />Horizontal</td> </tr> <tr> <td class="item">How many columns?</td> ...
Get Programming ASP .NET now with the O’Reilly learning platform.
O’Reilly members experience books, live events, courses curated by job role, and more from O’Reilly and nearly 200 top publishers.

