December 2022
Beginner to intermediate
618 pages
12h 41m
English
In this chapter, we look at recipes for using digital components such as switches and keypads. This chapter also covers modules that have a digital output that can be connected to a Raspberry Pi general-purpose input/output (GPIO) acting as an input.
Many of the recipes require the use of a solderless breadboard and jumper wires (see Recipe 10.9).
You want to connect a switch to your Raspberry Pi so that when you press it, some Python code is run.
Connect a switch to a GPIO pin and use the gpiozero library in your Python program to detect the button press.
To make this recipe, you’ll need the following:
Breadboard and jumper wires (see “Prototyping Equipment and Kits”)
Tactile push switch (see “Miscellaneous”)
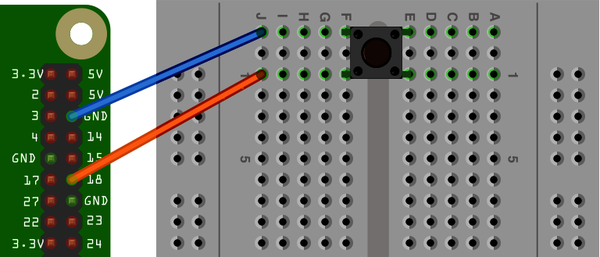
Figure 13-1 shows how to connect a tactile push switch using a breadboard and jumper wires.
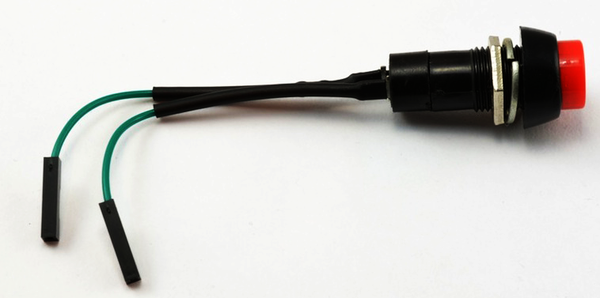
An alternative to using a breadboard and tactile switch is to use a Squid Button (Figure 13-2). This is a push switch with female header leads soldered to the end, which you can directly connect to the GPIO connector (Recipe 10.11).
Open an editor and paste in the following code (ch_13_switch.py ...
Read now
Unlock full access


 O’Reilly covers everything we've got, with content to help us build a world-class technology community, upgrade the capabilities and competencies of our teams, and improve overall team performance as well as their engagement.I wanted to learn C and C++, but it didn't click for me until I picked up an O'Reilly book. When I went on the O’Reilly platform, I was astonished to find all the books there, plus live events and sandboxes so you could play around with the technology.I’ve been on the O’Reilly platform for more than eight years. I use a couple of learning platforms, but I'm on O'Reilly more than anybody else. When you're there, you start learning. I'm never disappointed.I'm always learning. So when I got on to O'Reilly, I was like a kid in a candy store. There are playlists. There are answers. There's on-demand training. It's worth its weight in gold, in terms of what it allows me to do.