Chapter 1. The Guided Tour and Special Features
You’ll learn to:
Operate the Fire phone’s hardware
Navigate the Carousel, Apps Grid, and side panels
Use Dynamic Perspective
Control the Fire with gestures—including one-handed gestures
THE FIRST TIME YOU hold the Fire phone, you’ll want to put it through its paces: admiring its unique 3D Lock screen, trying out Firefly (which identifies objects and gives you more information about them), and doing all kinds of amazing things by merely tilting the phone. Oh, yes, and you’ll want to also check your email, run apps, read books, and browse Amazon. Before you do that, though, you need a solid understanding of how the Fire phone works and familiarity with all its different parts. You’ll want to know where all its buttons, keys, and ports are located, for example—not to mention how to get to your Home screen.
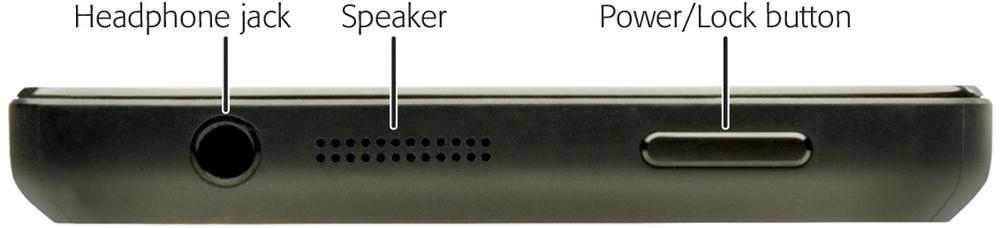
Power/Lock Button
AT THE FIRE PHONE’S top left, you’ll find a small, rectangular black button. It’s a hardworking button with multiple functions. Press it, and it opens your Lock screen. Press and release it when the phone is turned on and active, and it puts the phone into Standby mode. When you press and hold the button when the phone is turned on, a screen appears that lets you power off or restart the phone.
Locking the Screen
When you put the Fire phone on Standby using the Power/Lock button, the screen stops responding to touch. It blacks out, indicating that the screen is locked. Always lock the screen before putting the Fire phone in your pocket or bag to avoid accidental screen taps and embarrassing unintended phone calls. In fact, every time you leave the phone untouched for a certain amount of time—as little as 30 seconds to as much as 30 minutes (which you can adjust, as described on Select a Lock Screen Scene)—the screen automatically locks itself.
To use the Fire phone again, you must unlock it. Press the power button or the Home button, and then put your fingertip on the screen and slide up. If you’ve set up a PIN or password on your phone so that only someone who has the code can use it (Select a Lock Screen Scene), then type the PIN or password to complete the unlocking process.

Tip
While the screen is locked, the Fire phone still operates behind the scenes, checking email and Facebook on schedule. Also, you can still get phone calls and text messages while the screen is locked. You can have the Fire phone display notifications for missed calls and other incoming information on the Lock screen. Swipe down from the top of the screen or use the one-handed Swivel gesture to display the Quick Actions panel (Quick Actions Panel). Then tap the Settings icon (it looks like a gear) and tap Lock Screen→“Turn on notifications on the Lock screen.” Move the slider from Off to On. You can also customize the Lock screen settings in other ways, too, including changing its picture (described next).
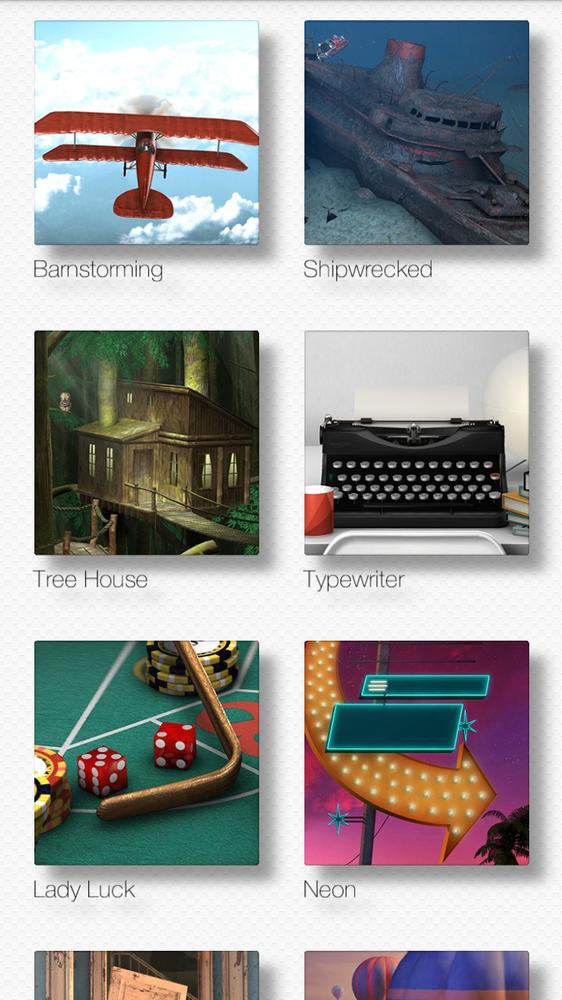
Changing the Lock Screen Image
You’re not stuck with the Lock screen image you see when you first turn on your Fire phone. There are plenty of others you can use. To choose a different one, swipe down from the top of the screen (or use the one-handed Swivel gesture) to display the Quick Actions panel, select Settings→Lock Screen→“Select a Lock screen scene,” and then tap the screen you want to use. The scene appears full screen. Tap the checkmark if you want to use the scene and the X if you want to choose a different scene. Tapping the X sends you back to the list of screen images so you can choose another one.

You can also choose to have the Fire phone show a different Lock screen every day, every week, or always keep the same Lock screen. To do it, pull down the Quick Actions panel (Quick Actions Panel), and then select Settings→Lock Screen→“Select a lock screen scene.” Look toward the top of the screen for the text “Rotate Scene.” Underneath it you’ll see the words “Never,” “Every day,” or “Every week.” Tap Rotate Scene, and from the screen that appears, make your choice about how often, if ever, you want the Lock screen to automatically change.
Dynamic Perspective on the Lock Screen
As you’ve no doubt noticed, the Lock screen uses the Fire phone’s Dynamic Perspective feature (more on that on Dynamic Perspective) to make some remarkable-acting images. Not only is it three-dimensional, but you can also peek around and see the image from different perspectives just by moving the phone. Take a look at a few Lock screens to see Dynamic Perspective in action. A good one to try is the Barnstorming image, which shows an old-fashioned biplane in flight. Just by itself, it’s pretty cool looking as the plane bounces up and down as it flies, and the clouds go rolling by underneath it. Move the phone to the left, and three more biplanes fly into view, occasionally doing rolls and tricks. Move it to the right and up—now a blimp flies into view. Keep moving the phone around for even more changing 3D perspectives.
Note
If you turn off Dynamic Perspective (see Customizing Dynamic Perspective), you’ll still see the Lock screens, but they’ll be static images and won’t change perspective as you move the phone, or have any animations.


Headset Jack
ON THE PHONE’S TOP, you’ll find a 3.5-millimeter headset jack (Power/Lock Button). Notice that it’s a headset jack, not just a garden-variety headphone jack. It doesn’t just let you listen; it accepts incoming sound as well. That’s so you can plug a headset (like an earbud headset) into it and use it for making phone calls.
Of course, it’s also a headphone jack, so you can plug in headphones or even external speakers and enjoy the phone as a music machine.
About the Screen
THE SCREEN IS WHERE you and the Fire phone communicate with each other. It’s 4.7 inches measured diagonally. In technical terms, it has a 720 x 1280 pixel resolution and a 312-pixel density. When you turn the phone sideways, it switches to a widescreen TV and movie format.
Tip
Because you’re going to be touching the display with your fingers, it’s going to get dirty and streaky. Simply wipe it clean with a soft, lint-free cloth or tissue. The screen is scratch-resistant, but if you’re worried about scratches, get a case or a screen protector. See Appendix B for ideas.
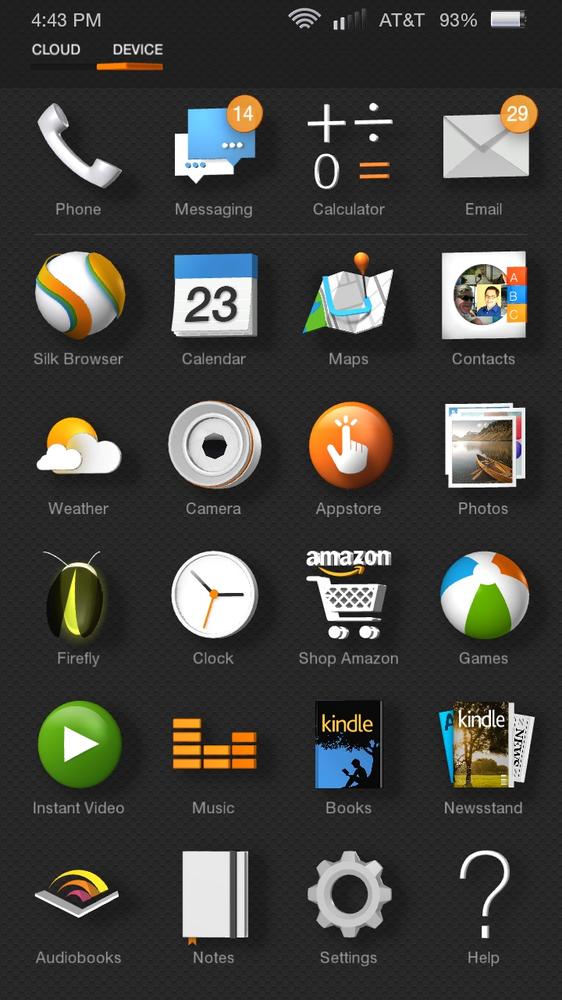
Status Bar Icons
THE FIRE MAKES SURE to keep you updated with information about its current status and any news, updates, and information it thinks is important. It does so by displaying a variety of icons in the Status bar at the top of the screen. The Status bar is divided into two parts. On the right side, you’ll find icons that indicate the Fire phone’s current state, such as signal strength, 3G or 4G connection status, the time, and so on. At left is the Notification area, which alerts you when you have email or voice messages waiting, when an event on your calendar is about to occur, and so on.
Note
Out of the box, your Status bar will be hidden, and in order to see it and the Status bar icons you’ll have to use a gesture called Peek. To peek, turn your phone to a very slight angle to the left or to the right. For more details, see Peek. And to have your Status bar be always visible, without peeking, swipe or swivel to pull down the Quick Actions panel, and then select Settings→Lock Screen→“Turn on notifications on the lock screen.”
Here are the most common icons you’ll come across:
Cell signal. The more bars you see, the stronger the signal. The stronger the signal, the clearer the call and the lower the likelihood that you’ll lose a connection. If you have no connection at all, instead of this signal, you’ll see the much-hated warning: “(No service).”
Roaming. If you’re outside your carrier’s service area and connected via another network, you’ll see the Roaming icon. Keep in mind that typically you’re charged for making calls or using data when you’re roaming, so when you see this icon, be careful what you do on your Fire phone—maybe it’s not the time to download 30 songs and a half-hour TV show.
3G/4G. This one appears when you’re connected via 3G or 4G high-speed broadband service, which should be most of the time.
Bluetooth connection. This icon indicates that you’ve turned on Bluetooth, for making a connection to a headset or some other device.
Mobile hotspot. Your Fire phone can serve as a mobile hotspot, providing Internet service for other devices, including five computers, smartphones, or other devices and gadgets via WiFi. See Turning Your Fire Phone into a WiFi Hotspot for details.
Airplane mode. When you use Airplane mode, you turn off WiFi and cellular communications, so you can still keep using your phone’s apps, but it doesn’t interfere with navigation equipment.
Downloading. When you’re downloading an app or media file, the downloading icon appears.
New email message. You’ve got mail! See Reading Email for more about reading new email.
Voicemail message. You’ve got mail—voicemail, that is. (See Visual Voicemail to learn how to check your voicemail.)
Missed call. Someone called you, and you didn’t answer. You see this icon appear even if the person left no voicemail.
Time. Shows you what time it is. Say goodbye to your watch.
Battery. This shows you how much battery life you’ve got left. When the battery is charging, you see a battery-filling animation and a tiny lightning bolt.
USB connection. The USB connection icon appears when you connect your phone to your computer via a USB cable for a variety of reasons, including copying and syncing files (Chapter 6).
Home Button
WHEREVER YOU ARE ON the Fire phone, press the Home button and you’ll come back to the Home screen—either in the Carousel or Apps Grid view (Home Screen, Carousel, and the Apps Grid). When the phone is locked, press it to bring up the Lock screen.
This multitasking button has a few other tricks up its sleeve, depending on where you are when you press it:
Pressing it in Apps Grid view brings up the Carousel, and vice versa.
Pressing and holding it brings up voice activation features (Controlling the Fire with Your Voice).
Double-tapping it brings up Quick Switch multitasking mode (Fancy App Tricks).
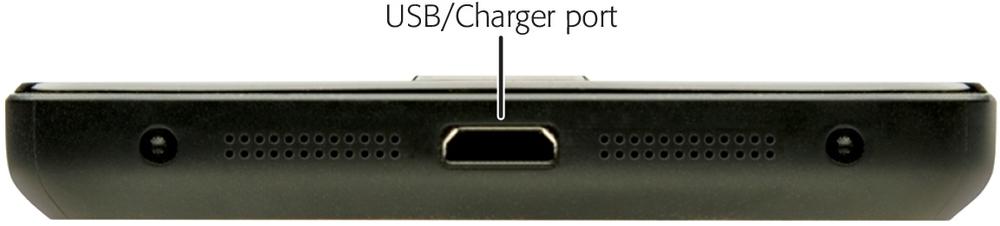
Multipurpose Jack and Charger
FOR TRANSFERRING FILES BETWEEN your computer and the Fire phone, there’s a micro-USB port at the phone’s bottom. Plug one end of the USB cable that comes with the phone into it, and the other end into a computer, and you can transfer to your heart’s content (Connecting Your Fire to Your Computer).
When your Fire phone is plugged into a computer in this way, it also gets charged, although at a slow rate. If you want to charge the phone more quickly, plug one end of the cable into the micro-USB port and the other end into the power adapter, which you plug into an electrical socket. Your Fire phone should charge in less than 5 hours. You’ll most likely need to charge the Fire phone every night.
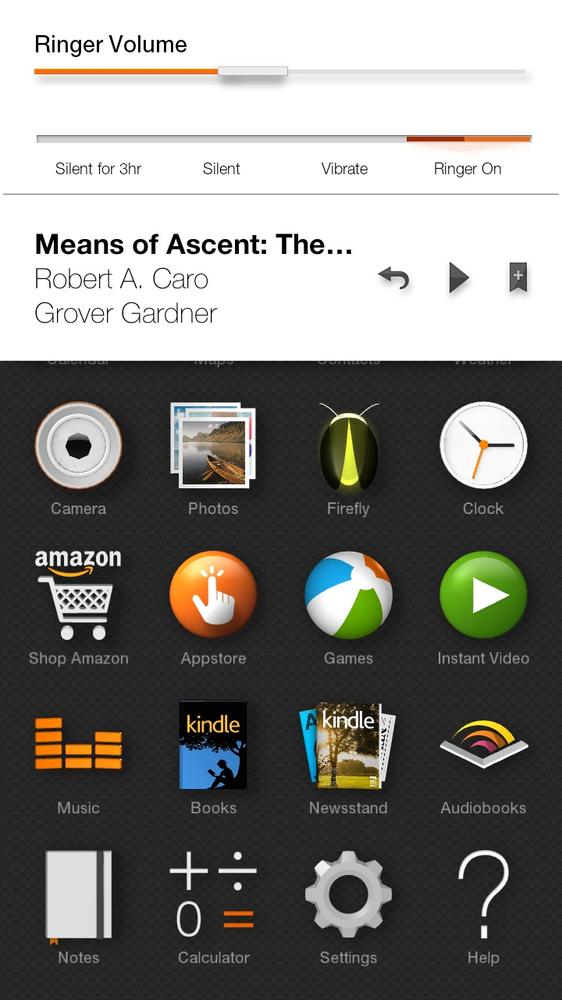
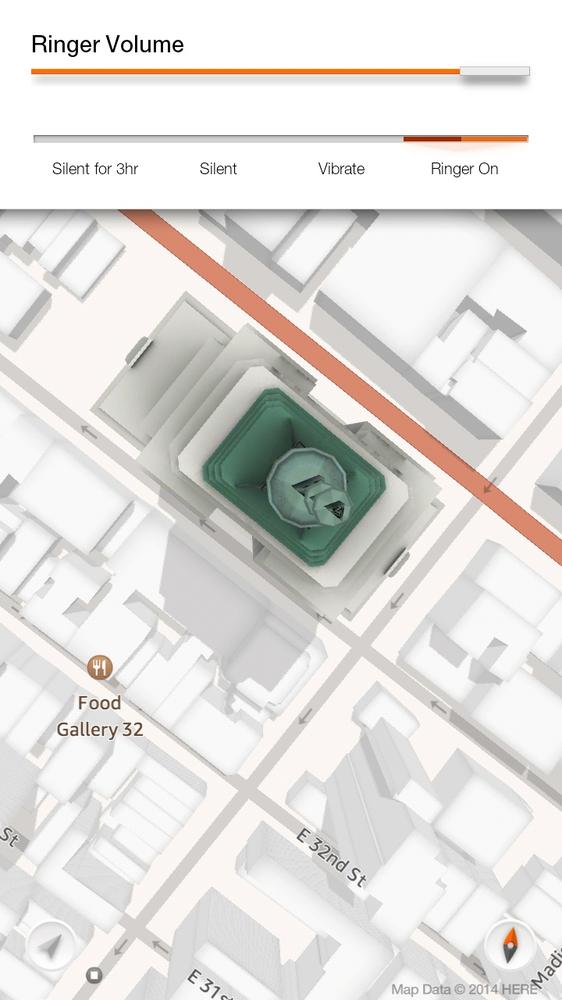
Ringer Volume
IS YOUR RINGER TOO loud? Too soft? Get it just right by using these two black buttons on the left side of the Fire phone, up toward the top.

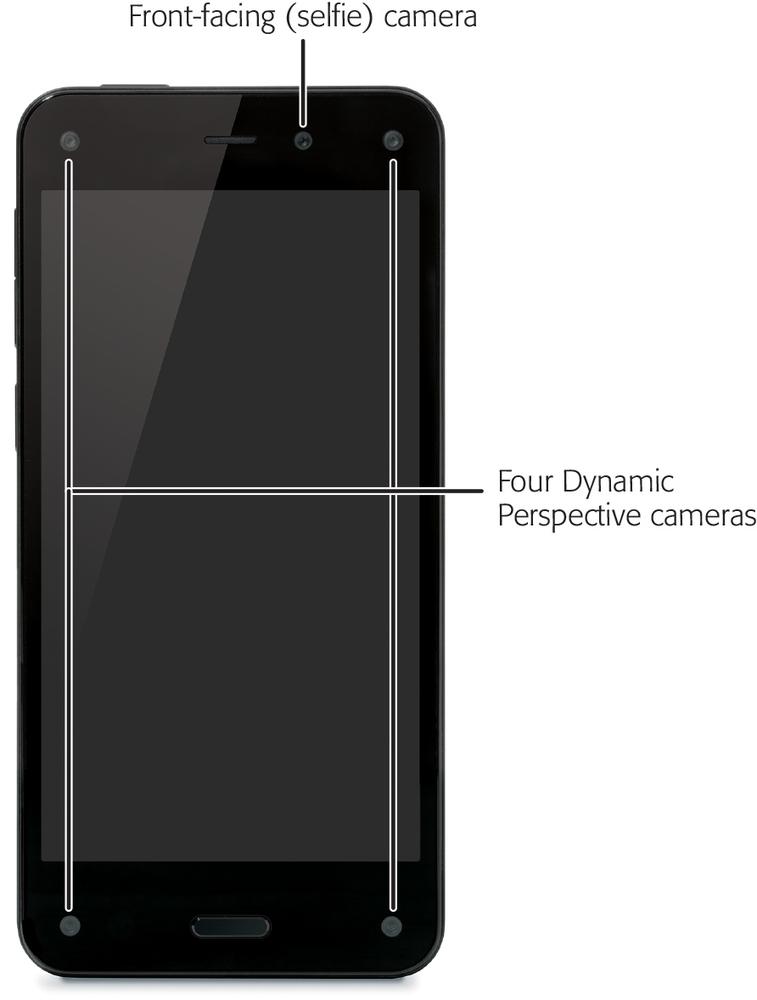
Camera
YOUR FIRE PHONE INCLUDES not one, but two cameras that are capable of taking videos as well as photos. The camera on the back, which is the one you’ll normally use for taking photos and videos, has a 13-megapixel resolution. The camera that faces you is for video calling and video chat, although you’ll probably take your share of selfies as well. It’s got a 2.1-megapixel resolution. To get to the camera, you can either tap the Camera icon on the Carousel or Apps Grid, or else press the small black button just below the volume buttons. That button does double-duty: Hold it down and you turn on the Fire’s Firefly feature (Understanding Firefly). (For more information about shooting photos and videos with these cameras, see Taking Still Photos.)
The Fire phone has four other cameras as well, one at each corner of its front. These cameras don’t take photos. Instead, they’re used for the Fire phone’s Dynamic Perspective feature (Dynamic Perspective).
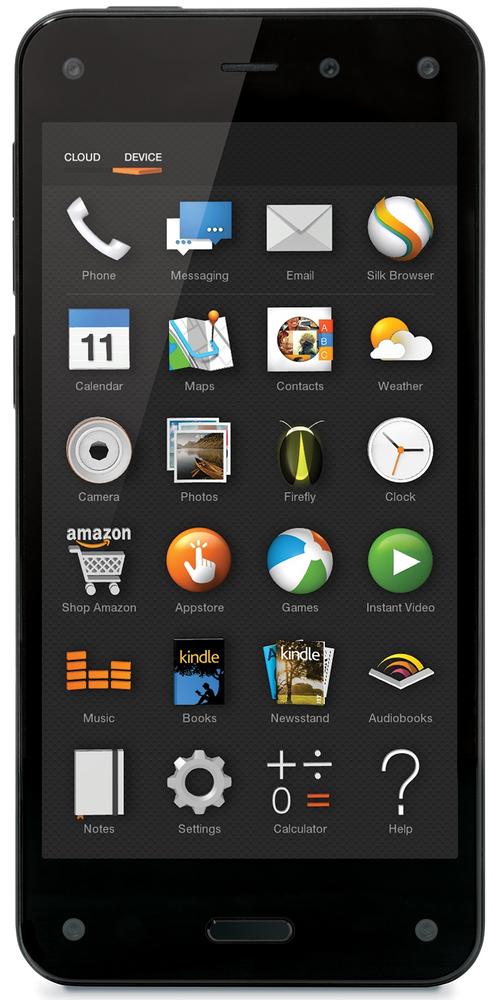
Home Screen, Carousel, and the Apps Grid
WELCOME TO YOUR NEW home, the Home screen. Get to it by pressing the Home button no matter where you are. Unlike other phones, the Home screen has two views, not one: the Carousel view and the Apps Grid. Switch between them by pressing the Home button.
The Carousel gets its name because of the way its icons rotate gracefully across the screen. In this view, apps you’ve recently used appear as big icons, one at a time at the top of the screen, newest first. They have no text labels, even when you use the Fire phone’s Peek feature (Peek), so they can be hard to recognize the first time you see them. Also, the Carousel shows you much more than just your apps. It shows you your recently viewed books, videos, and other items. You see the most recently used item first, and as you swipe, you see apps you’ve previously used. You can also pin items to force them to show up first on the Carousel (Customizing the Carousel and Apps Grid).
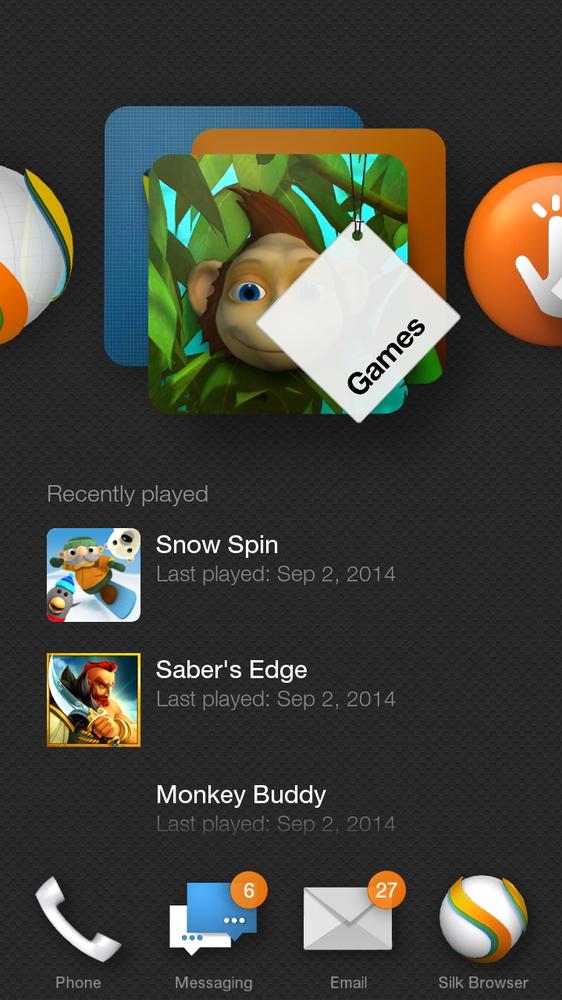
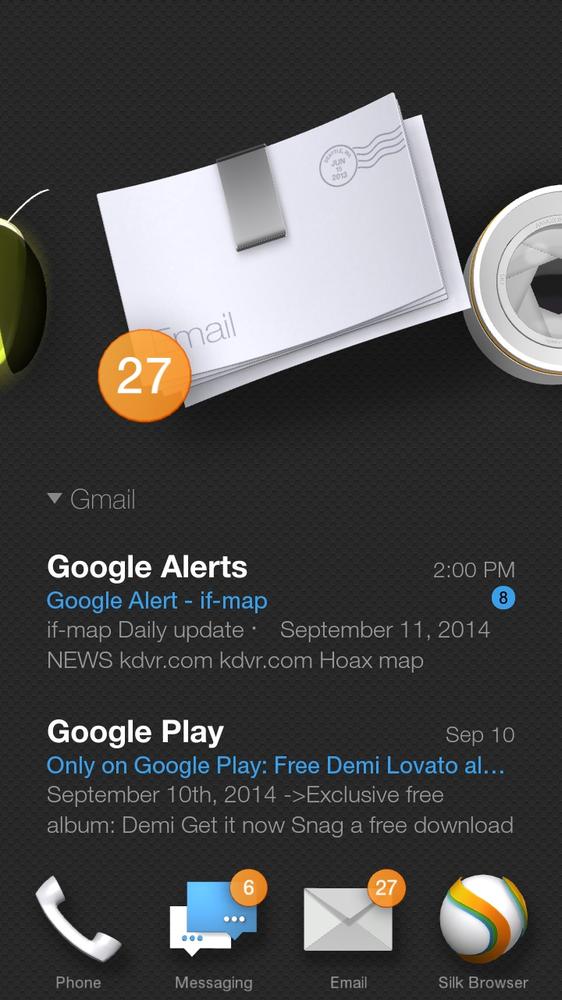
Underneath each big icon, you’ll see the latest actions, files, or recommendations associated with that app. For example, underneath the Videos icon, you’ll see recent videos you’ve watched, while underneath the Mail icon you’ll see your most recently received emails. Tap the big icon to launch the app; tap any of the items underneath it to launch that content in the app.
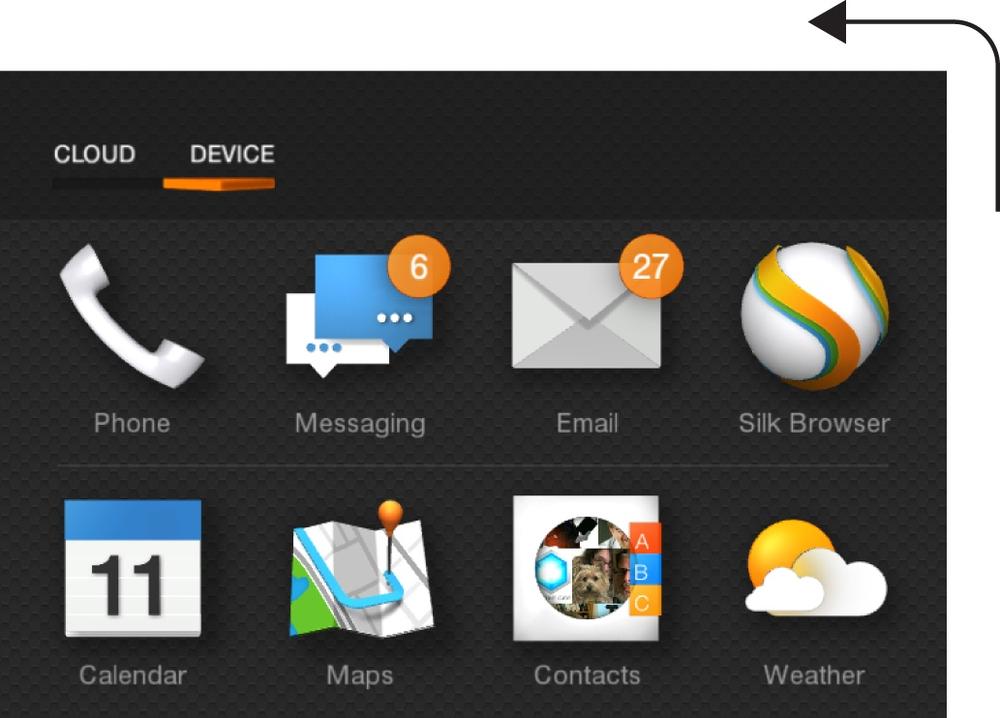
Down at the bottom of the screen in Carousel view you’ll find four icons:
Phone for making phone calls.
Messaging for sending and receiving text messages.
Email for sending and receiving email.
Silk Browser for browsing the Web.
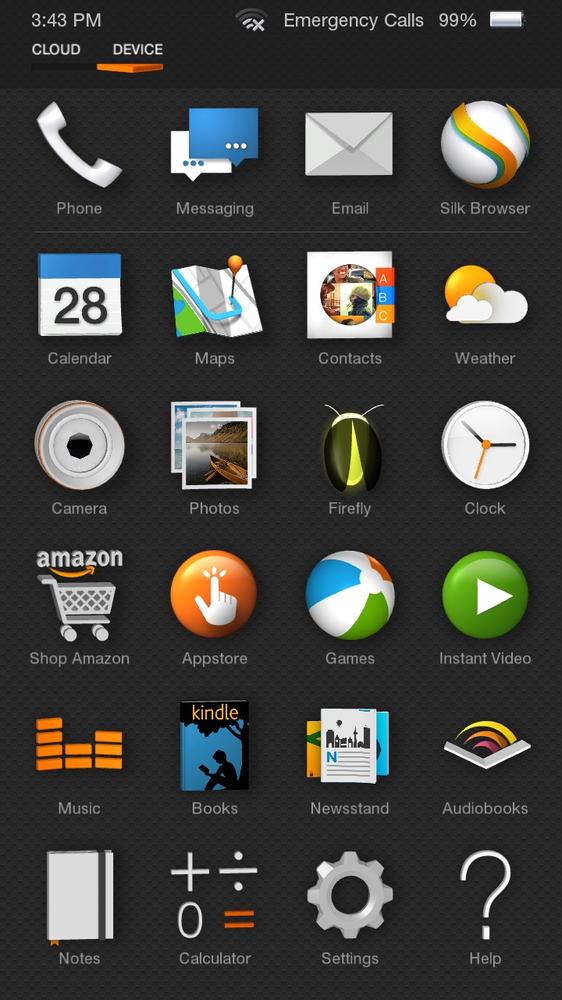
The Apps Grid displays all of your apps in a scrolling grid. Keep swiping up to get to more apps until you come to the end. Tap any icon to launch the app.
Customizing the Carousel and Apps Grid
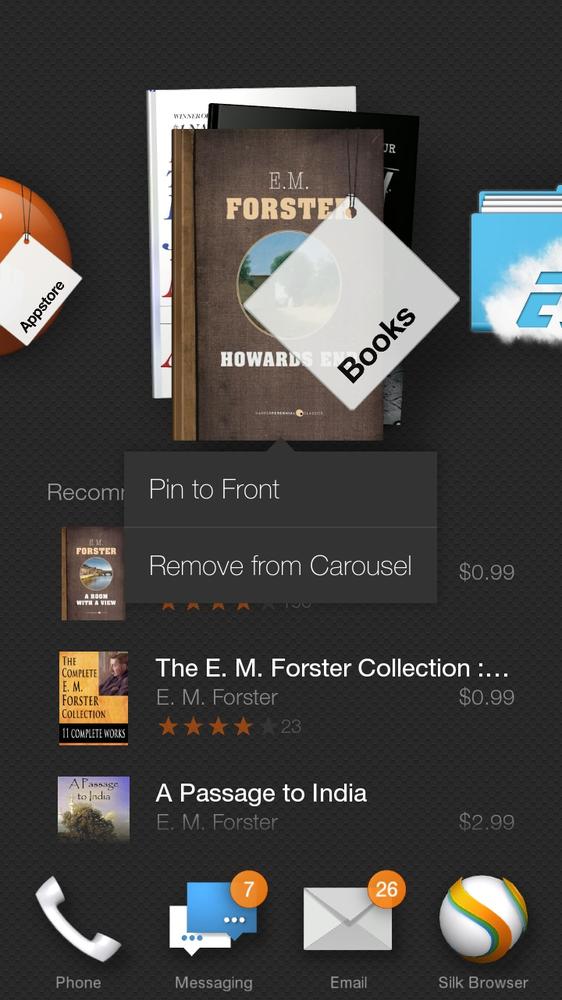
You’re not stuck with what’s in the Carousel; you’re free to remove items from it. And you can add items to it as well. To remove an item from the Carousel, hold your finger on it and choose “Remove from Carousel.” If you have a favorite app or other item, you can make it appear first in the Carousel—choose “Pin to Front.” If you hold your finger on an app that can be uninstalled from the Fire phone, a third choice will show up—“Remove from Device.”
Note
Not all apps can be removed. You can’t, for example, remove built-in apps such as Email and Videos.
You can remove apps from the Apps Grid in the same way: hold your finger on any and select “Remove from Device.” You can also change the order in which apps appear by dragging an app from one location to another.
Left and Right Panels
IN ANY APP OR screen on the Fire phone, you can display left and right panels, which give you more features and options related to whatever you’re currently doing. To display the left panel, swipe from the left side of the phone toward the center of the screen, and to display the right panel, swipe from the right side. You can also use the one-handed Tilt gesture (Tilt) to display them. To open the left panel, tilt the top of the phone to the right; to open the right panel, tilt to the left.
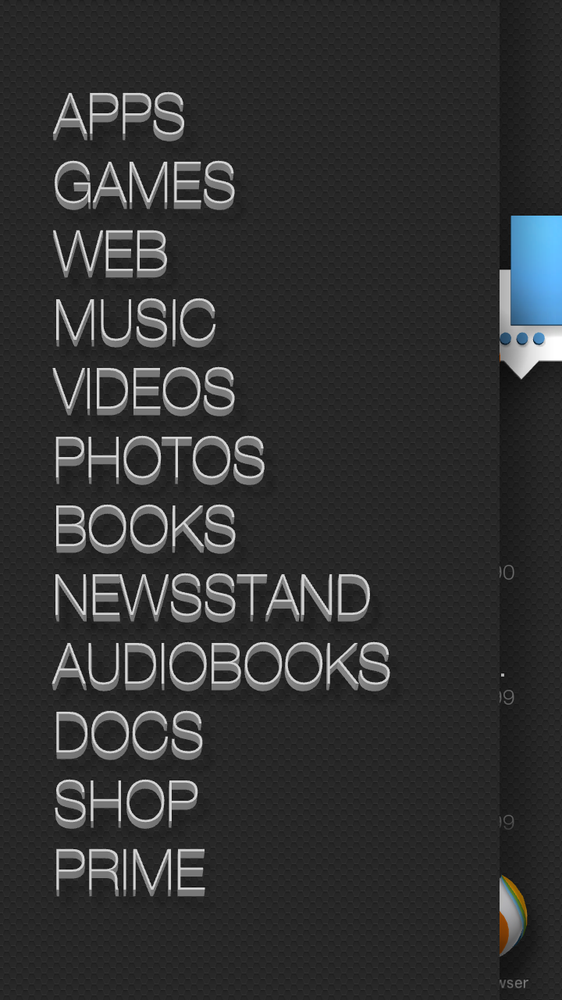

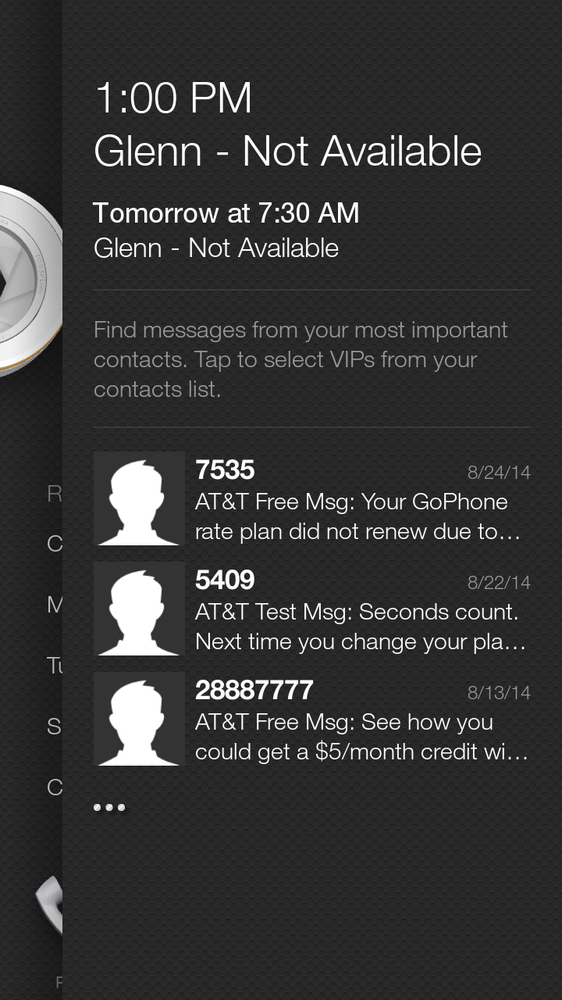
When you’re on the Carousel or Apps Grid, the left panel displays a list of various types of content you can browse, including Apps, Games, Music, Books, and so on. The right panel shows your most recent appointment from your calendar, the local weather, and recent text messages. You’ll see different information in these panels depending on what you’re doing. The left panel typically displays additional menus and offers navigation features—for example, when you’re reading a book, you’ll see its table of contents in the left panel. The right panel typically shows information or commands relevant to what you’re currently doing. For example, when you’re listening to music, the right panel uses X-Ray to show you the song’s lyrics (Buying music from the Music app), and when you’re writing a text message, the right panel lets you attach a photo.
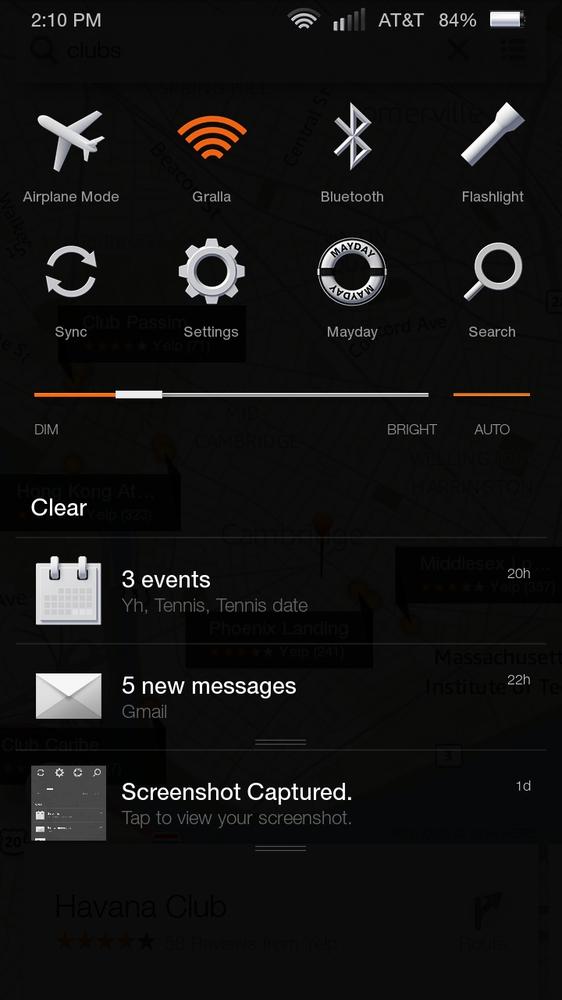
Quick Actions Panel
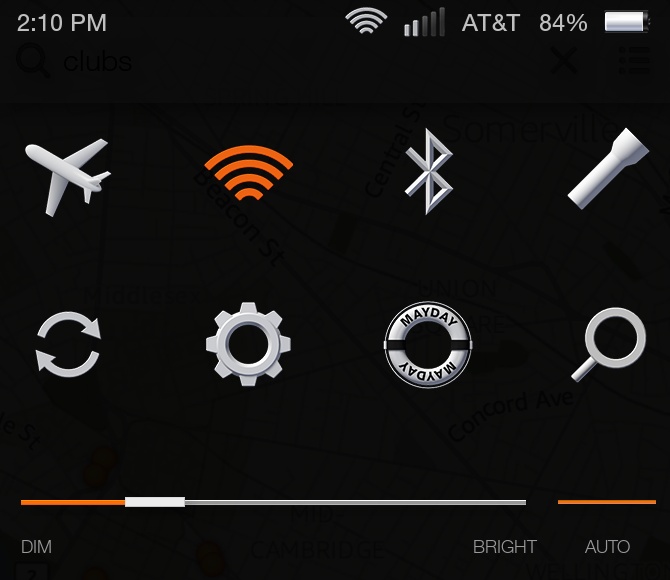
WHATEVER SCREEN YOU’RE ON, you can swipe down from the top of the screen to display the Quick Actions panel. You can also use the one-handed Swivel gesture (Swivel) to display it. Just swivel your wrist to either the left or right. As the name suggests, this panel gives you immediate access to common actions—like changing settings, turning on WiFi, and so on. Here are your options:
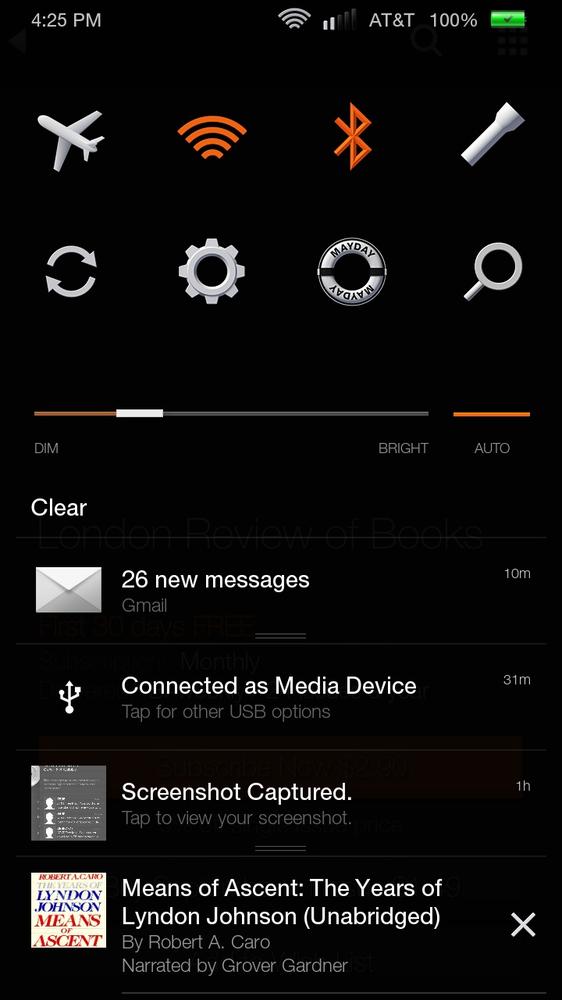
Airplane mode turns on and off all of your Fire phone’s radios, including WiFi, cell service, and Bluetooth.
WiFi turns WiFi on and off (How the Fire Phone Gets Online).
Bluetooth turns Bluetooth on and off (Bluetooth Earpieces).
Flashlight turns your Fire phone into a surprisingly powerful flashlight by turning on the camera’s flash and keeping it on until you tap the Flashlight icon again.
Sync tells the Fire phone to contact Amazon and grab any new purchases, information, and updates. For example, syncing downloads items you’ve recently bought from Amazon, such as books and videos. It also gets you any software updates that are available for the Fire phone and downloads any new or updated apps.
Settings gives you access to all the Fire phone’s settings (Warranty and Repair).
Mayday puts you in touch with someone at Amazon to get tech help (Mayday).
Search finds any terms you type in. It’s a big search—it searches content on your device, in the cloud, in the Amazon stores, and on the Web.
Underneath these icons, there’s a slider that lets you make the screen brighter or dimmer. If you prefer, tap Auto to have the phone detect ambient light and choose the best brightness setting.
Underneath that are notifications of all kinds—messages you’ve received, apps updated, and more.
Controlling the Fire with Your Fingers
WITH THE FIRE PHONE, your fingers do the walking. They do all the work that you do on a computer with a mouse or keyboard. Here are the basic finger strokes you can use on the phone’s screen.
Note
The Fire phone also makes use of one-handed gestures, which let you do all kinds of navigation tricks with just a single hand. For details, see Double-Tap.
Tap
Tapping is as basic to the Fire phone as clicking is to a mouse. This simple gesture is how you press onscreen buttons, place the cursor for text entry, and choose from menus.
Touch and Hold
Touch an object and hold it for several seconds, and depending on what you’re holding, an option menu appears. For example, when you touch and hold an icon on the Apps Grid, a menu appears that lets you delete the app. You also touch and hold an object to grab it and drag it somewhere.
Drag
After you’ve grabbed something, you can drag it with your finger—like dragging an icon to the Trash.
Swipe
Swipe your finger across the screen to perform some specific tasks, like unlocking your phone after it’s been put into Standby mode, or answering a call if the phone is locked.
Flick
Think of the flick as a faster slide, done vertically when scrolling through a list, like your contacts list. The faster you make the flicking motion, the faster your screen scrolls—sometimes too fast. You can stop the motion, though, by touching the screen again. To scroll through large lists quickly, you can flick multiple times. (You can also scroll in some apps using Dynamic Perspective by merely tilting the phone. See Auto-Scroll for details.)
Pinch and Spread
In many apps, such as Maps, you can zoom in by spreading your fingers—placing your thumb and forefinger on the screen and spreading them apart. The amount you spread your fingers will determine the amount you zoom in.
To zoom out, put your thumb and forefinger on the screen and pinch them together. The more you pinch, the more you zoom out.
Double-Tap
When you’re viewing a map, a picture, or a web page, you can zoom in by double-tapping. In some instances, once you’ve reached the limit of zooming in, double-tapping again restores the zoom to its original size. In Maps, you can also zoom out by tapping with two fingers.
Go Back
At first glance the Fire phone seems to be missing something important—some kind of back button that lets you return to the screen you were on previously. It’s true that the Fire phone has no back button, but that’s because you don’t need one. Instead, you use a gesture to go back to where you once belonged.
To do it, when you’re holding the phone in portrait mode (that is, vertically), swipe up from the bottom of the screen. Voilà! There you are, back to the screen you were on last. If you’re holding the phone in landscape mode (that is, horizontally), and are running an app that runs in landscape mode, then you’ll have to swipe from the side.
Note
Be careful when making the Go Back gesture that your finger starts below the bottom of the screen. It will be to the left or right of the Start button, not on the Start button itself.
When you use go back on the Lock screen, you’ll go to the last screen you were using before the Lock screen turned on. However, the Go Back gesture doesn’t have a long memory. So if you turn your phone off and then back on again, it won’t remember which screen you were on when you turned off your phone, and you’ll end up on the Home screen.
One-Handed Gestures
WITH THE HELP OF the Fire phone’s four front-facing Dynamic Perspective lenses (Home Screen, Carousel, and the Apps Grid), you perform many tasks with just one hand—the one you’re holding the phone in. One-handed gestures are not only convenient; they also let you do things that you can’t accomplish with the standard tapping and swiping gestures.
Tip
If you find one-handed gestures difficult to use (or just plain don’t like them), you can turn them off. Swipe from the top to pull down the Quick Actions panel and select Settings→Device→Manage Accessibility→Low Motion.
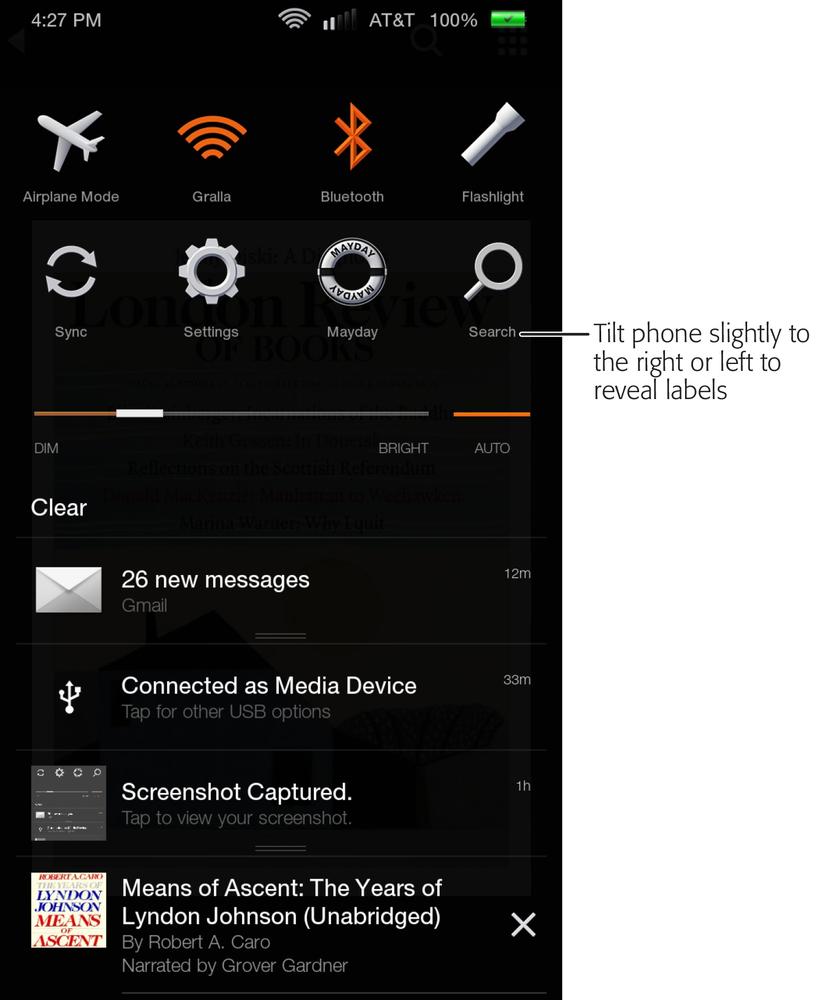
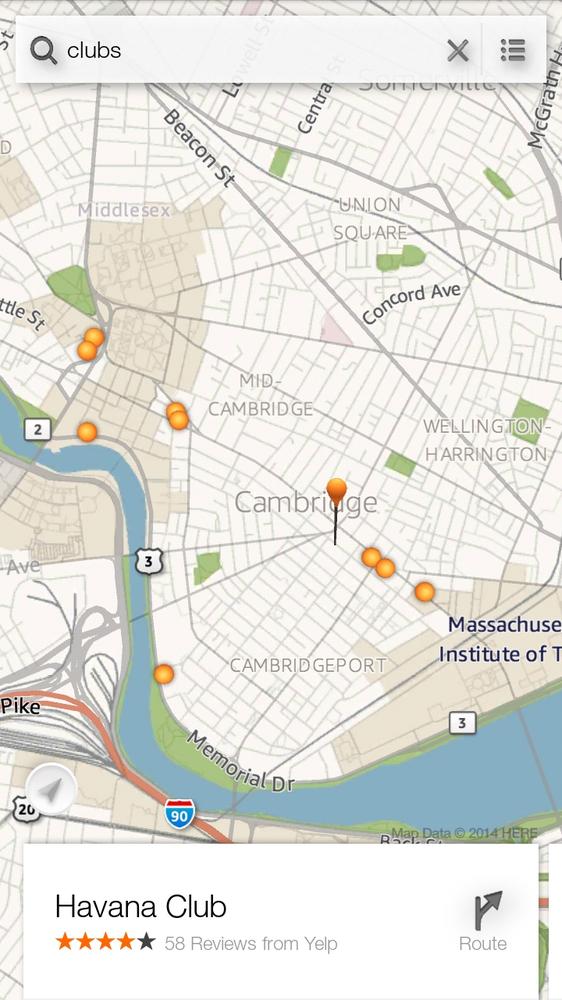
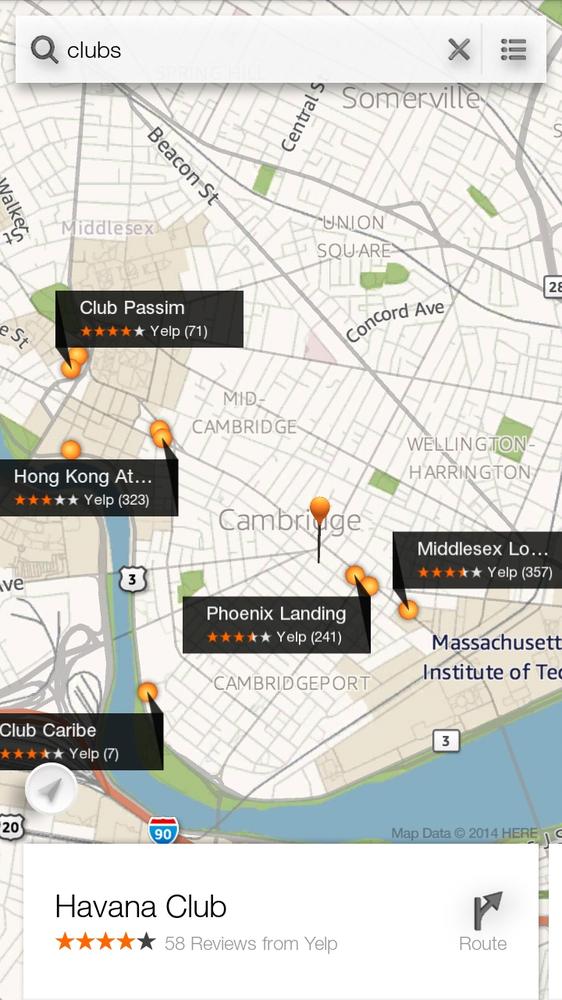
Peek
Turn your phone to a very slight angle to the left or to the right, and you’ll see otherwise-hidden pieces of information about whatever is on your screen. For example, if you’re using Maps and searching for “clubs,” peeking reveals information about each pinned club on the map, including its name and Yelp rating info.
Peek also lets you peek around landmarks in Maps, giving you different 3D views of landmarks and buildings, and even looking behind and around them.
If you’re in the Quick Actions panel, then when you peek, you’ll see the name of each icon.

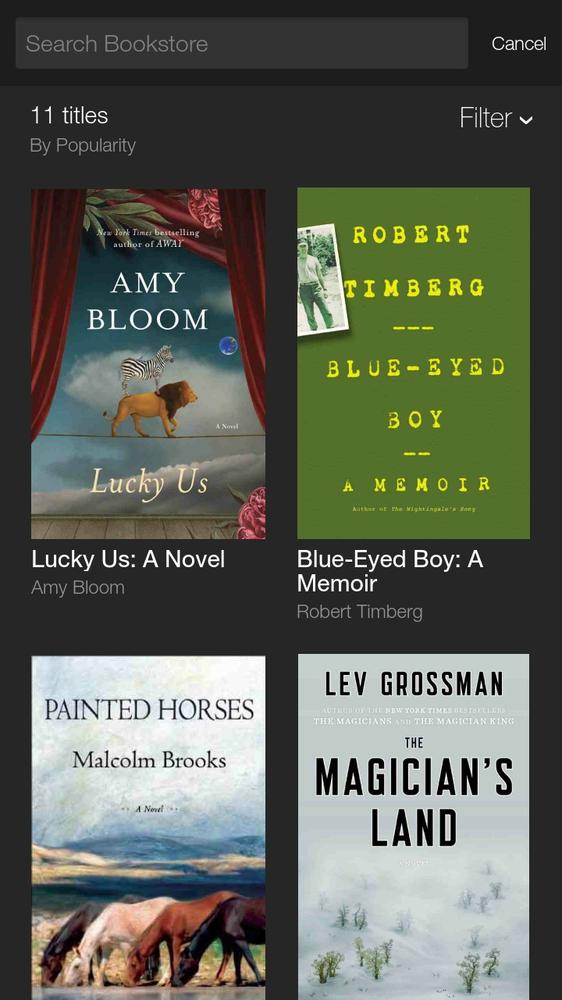
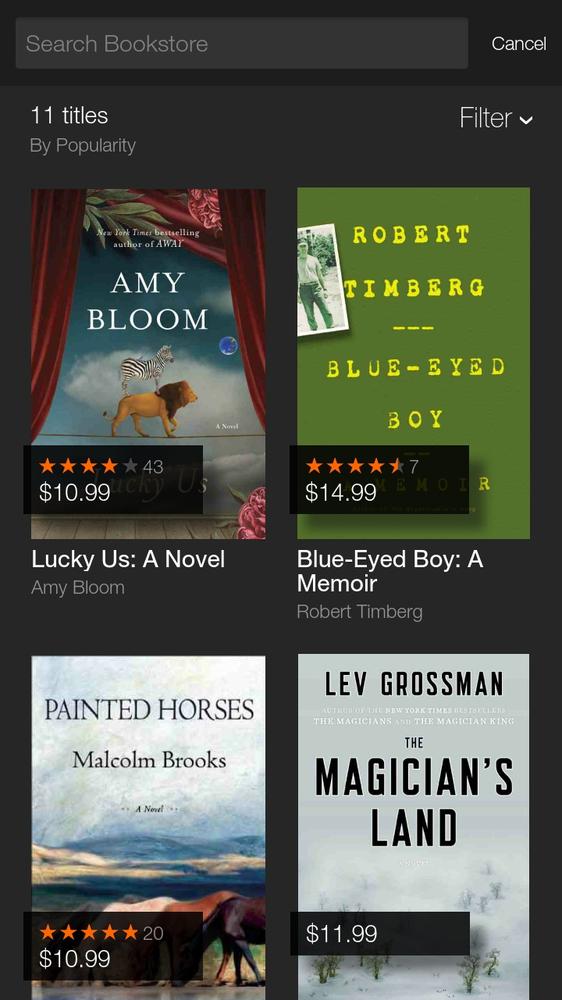
If you’re shopping in the Kindle Store, then when you peek, you’ll see ratings for books.
Peeking works on just about every single screen on the Fire phone. Sometimes the effect will be so subtle you won’t even notice it—for example, it may do nothing more than make menu items appear three-dimensional. You can make up a new parlor game—what will peeking do on which Fire phone screen?
Tilt
Get to know this gesture, because it may be the one that you’ll find yourself using most often. Tilt is the one-handed way to open the ever-useful left and right panels (Left and Right Panels). To open the left panel, tilt the phone’s left edge toward you and then back. This gesture works best if you do it in one sharp, swift motion. If you do it slowly or don’t bring it back to the start position, you may instead tell your Fire phone to peek instead of tilt.
You can also use the Tilt gesture to make the panel disappear. Simply reverse the motion: tilt the phone’s left edge away from you and then back toward the position in which it started.

To open the right panel, do the same thing from the other way: tilt the phone’s right edge toward you and then back. And to make the panel disappear, reverse the motion.
Swivel
While you’re holding the phone in portrait mode—that is, vertically—swivel your wrist either to the right or to the left and you’ll open the Quick Actions panel. In other words, you’re swiveling either the top-right or top-left corner of the phone left or right.
The Quick Actions panel is a fast, convenient way to perform all kinds of common tasks, like putting your phone into Airplane mode, using it as a flashlight, connecting to a WiFi hotspot, turning on Bluetooth, searching the phone, getting Mayday support, and much more. For details, flip back to Quick Actions Panel.
Auto-Scroll
This gesture lets you scroll through long web pages on the Fire phone’s Silk browser, as well as through pages or screens on any other app that supports the gesture. To use it, angle the phone away from you to scroll down. An arrow appears toward the bottom of the screen to show the direction of your scroll. Angle the phone toward you to scroll up. Again, an arrow appears toward the top of the screen to show the direction of your scroll. You can change the pace of scrolling—the more you tilt the phone, the faster it scrolls.
Auto-Scroll works only with apps that have been built to use it. For example, when the Fire phone was first released, Auto-Scroll didn’t work with the Kindle app. Amazon is working on it, though, and says the Auto-Scroll Kindle feature will include a lock icon that will scroll at the pace you set without your having to keep tilting. That’s a good thing, because it would be pretty tough to read a book while you’re simultaneously tilting the phone toward and away from yourself.
Dynamic Perspective
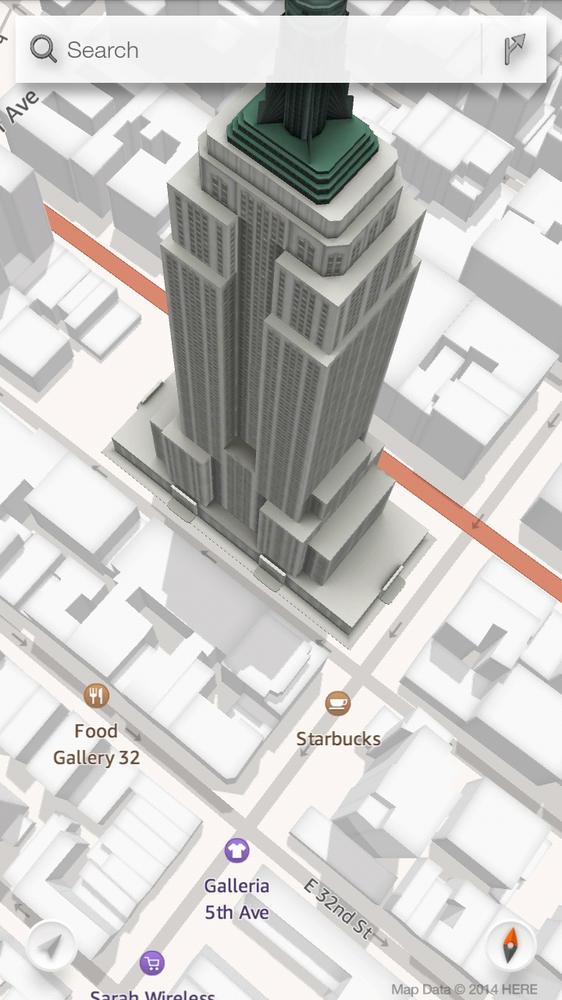
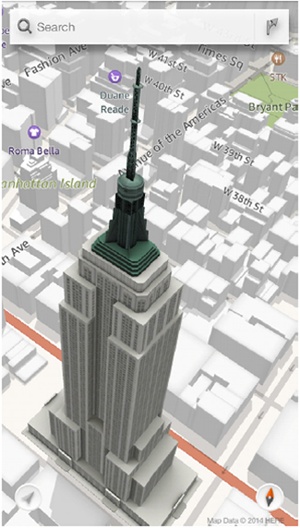
ONE OF THE FIRE phone’s unique features is Dynamic Perspective, which lets you take some kind of action by merely tilting the phone. For example, when you’re viewing a website in Silk, you can tilt the phone to scroll. Tilt it slightly and you scroll through web pages slowly; tilt it more extremely and you scroll faster. In Maps, you can get a full 3D view around a building merely by tilting the phone at various angles (Landmarks and 3D Look-Around).
Note
Dynamic Perspective also powers one-handed gestures, like peeking behind an object, or revealing the left or right panel, as described in the previous section.
How Dynamic Perspective Works
The Fire phone uses some pretty impressive hardware to make Dynamic Perspective work its magic. Four—count ’em, four—cameras on the front of the phone are devoted to this feature. Their lenses are easy to see; there’s one on each of the camera’s four front corners. And they’re not ordinary cameras. They’re infrared cameras, which lets Dynamic Perspective work even in the dark.
The software underlying it all has been optimized for recognizing human faces, so it recognizes faces and the angle they’re looking at the phone. The software uses the cameras as sensors to determine your position relative to the image that’s being shown on the screen. One of its best features is that it lets you “peek” behind and around objects to see what’s behind them, or to see them from different angles as you move your phone in relationship to your face. Here are just a few of the things you can do with it:
Look at the Empire State Building from different angles by merely moving the phone.
Look around and behind 3D objects on your Lock screen.
If you’re looking for seats at a sports stadium, arena, or other venue in an app like StubHub, you can tilt the phone and see the actual view you’ll get from your seat in multiple directions, just as if you were actually there.
You can use Dynamic Perspective as a kind of game controller (Using Dynamic Perspective as a Game Controller) and can also look around corners and obstacles in games before you get there, so you’re not surprised by any nasties.
There’s more as well, because Dynamic Perspective is built into the very DNA of the Fire’s operating system. With time, more and more apps will take advantage of its powers. Amazon has publicly released a Dynamic Perspective software development kit (SDK) and an associated application programming interface (API). That means that independent developers can build all kinds of Dynamic Perspective capabilities right into their apps. Expect plenty of them in the future.
Note
Unfortunately, Dynamic Perspective can eat up battery life. See the box on Maximizing Your Battery Charge for more detail.
Customizing Dynamic Perspective
You might not like certain one-handed gestures, or you might not like Dynamic Perspective at all and want it turned off entirely. To do it, swipe or swivel to pull down the Quick Actions panel and select Settings→Device→Manage Accessibility→Low Motion. To turn off Dynamic Motion entirely, including all one-handed gestures, turn Low Motion Mode at the top of the screen from Off to On.
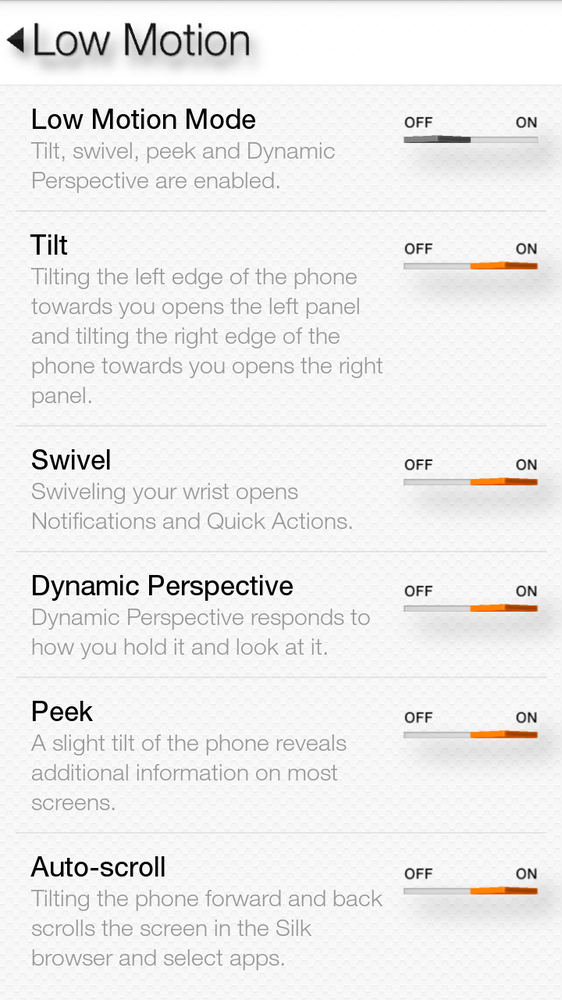
If you want to instead turn off only one or several one-handed gestures, don’t turn Low Motion Mode on. Instead, turn off any one-handed gesture you don’t want to work anymore. To change the settings back to the way they were, come back to this screen.
Using Dynamic Perspective as a Game Controller
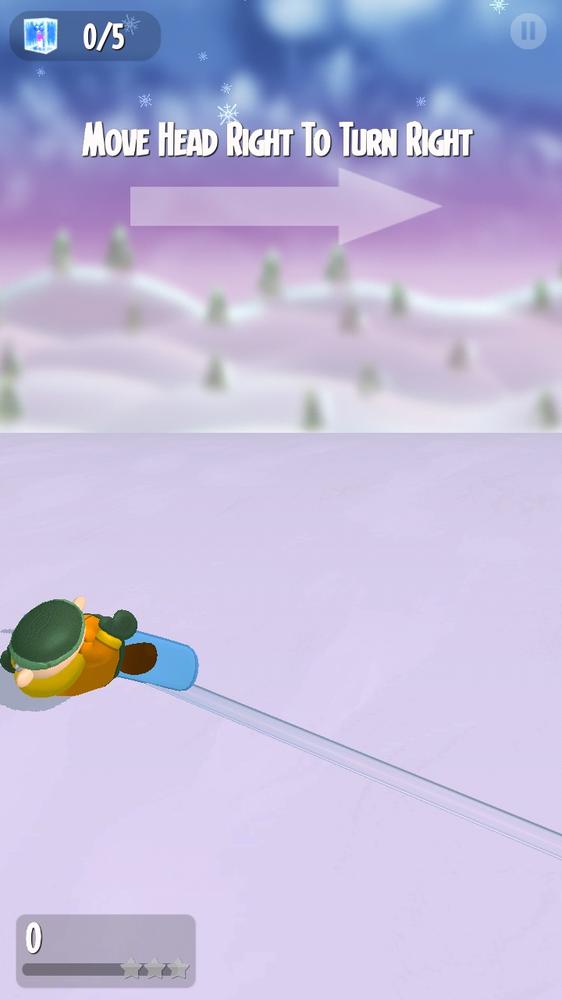
To get a sense of what Dynamic Perspective can really do, try a few games that use Dynamic Perspective. Some of them even use it as a game controller. It’s clearly the future of immersive 3D gaming. There are a number of games that use it that you can try out now—search for them in the Amazon Appstore (Getting Apps from Amazon’s Appstore). For example, the free Saber’s Edge is a combination fighting and strategic 3D puzzle game. It uses Dynamic Perspective to peek around corners of a puzzle’s cube, or to tilt the cube left or right to another face. If you’re more interested in action and using your head as a game controller, try the free Snow Spin. Just move your head left or right to control the snowboarder.

Amazon Prime
ONE OF THE FIRE phone’s biggest benefits is a free year of Amazon Prime. This set of premium services normally costs $99 a year. That may well exceed the cost of the Fire—at one point Amazon dropped the price to 99 cents (Customizing the Carousel and Apps Grid). At that price, if you were already planning to subscribe to Amazon Prime, you essentially got your phone and Amazon Prime for free for a year. That’s a pretty good deal, and one that no other phone can offer.
Note
If you already have a Prime subscription, you get an additional year tacked onto the end when you buy a Fire Phone.
When you register your phone during your initial setup process, make sure to use your existing Amazon account if you have one. That way, that account will get all the Prime benefits. If you don’t already have an Amazon account, you’ll create one when you buy and register your phone.
Free Shipping
With Amazon Prime, you get free shipping, and you don’t need to order from your Fire phone to take advantage of it. You’ll get free two- or next-day shipping or a reduced price on same-day shipping on millions of eligible items when you buy on the Web or from another device. (The exact shipping charges vary based on where you live.)
Prime Instant Video
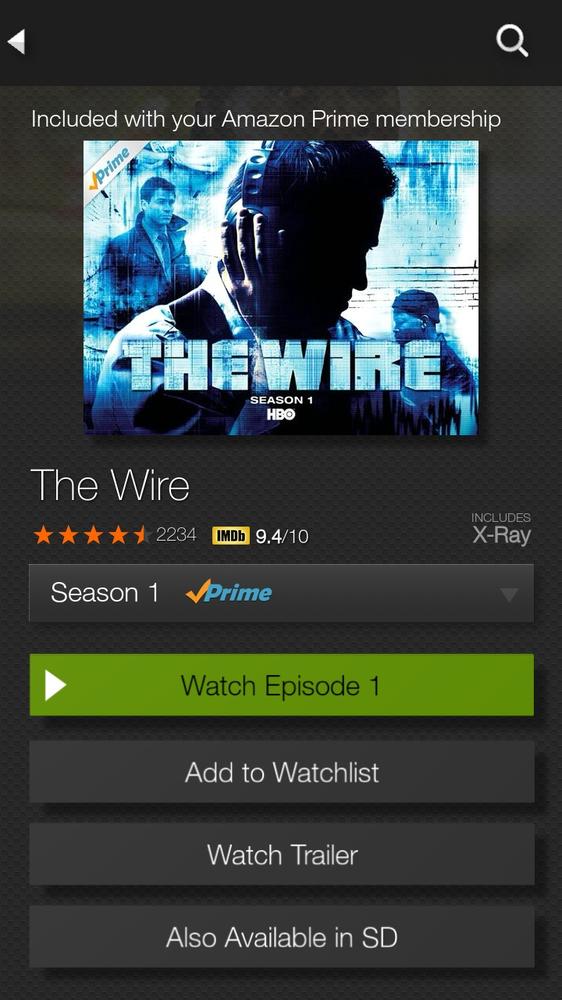
With Prime Instant Video, you get to watch an impressive video collection, including movies, TV shows, and Amazon-created series not available anywhere else, such as the political comedy Alpha House starring John Goodman and written by Doonesbury creator Garry Trudeau. Any video that’s labelled as “Prime Instant Video,” you can watch for free. Any videos that aren’t labelled “Prime Instant Video,” you’ll have to pay to either rent or buy.
In addition to watching the videos on your Fire phone, you can watch it on other devices like a Kindle, iPhone or iPad; a TV with an Internet connection or Fire TV or Fire Stick TV; a Blu-ray player; a gaming console; and almost any computer with an Internet connection.
On your Fire phone, you watch Prime Instant Video via the Instant Video app that comes with the phone (Watching Video with Amazon Prime Instant Video).
Prime Music
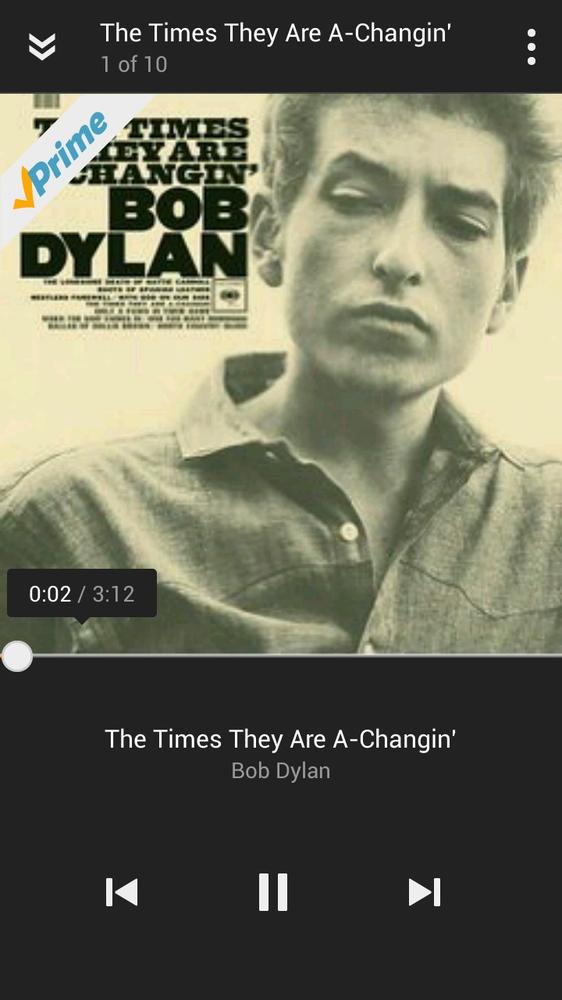
An Amazon Prime subscription includes free access to Prime Music, which lets you stream ad-free music to your Fire phone, Kindle Fire, PC or Mac, or other device. You select individual songs and albums and create playlists, and you can also listen to other people’s playlists. You get access to over a million tracks. Download the Prime Music app (Using Prime Music) to your Fire phone to listen to music there.
Note
When an album is on Prime Music, sometimes you’ll find that not all tracks are available. And keep in mind that while a million tracks sounds like a lot, it’s still a much smaller collection than the 20 million on Spotify (Searching Prime Music).
Access to Free Books
With Amazon Prime, you can read plenty of books for free, via two different Amazon programs—the Kindle Owners’ Lending Library and Kindle First.
The Lending Library gives you access to 500,000 titles. You can borrow and read the books for as long as you want; there’s no due date. You can read the books not only on your Fire phone, but on any Kindle device registered to your Amazon account. You can borrow one book a month. In the Kindle Store (Buying Books) swipe to reveal the left panel, and then scroll down and tap Kindle Lending Library. When you find a book you want to read, tap the “Borrow for Free” button. For more details on borrowing books, see Getting Books from the Library and the Web.
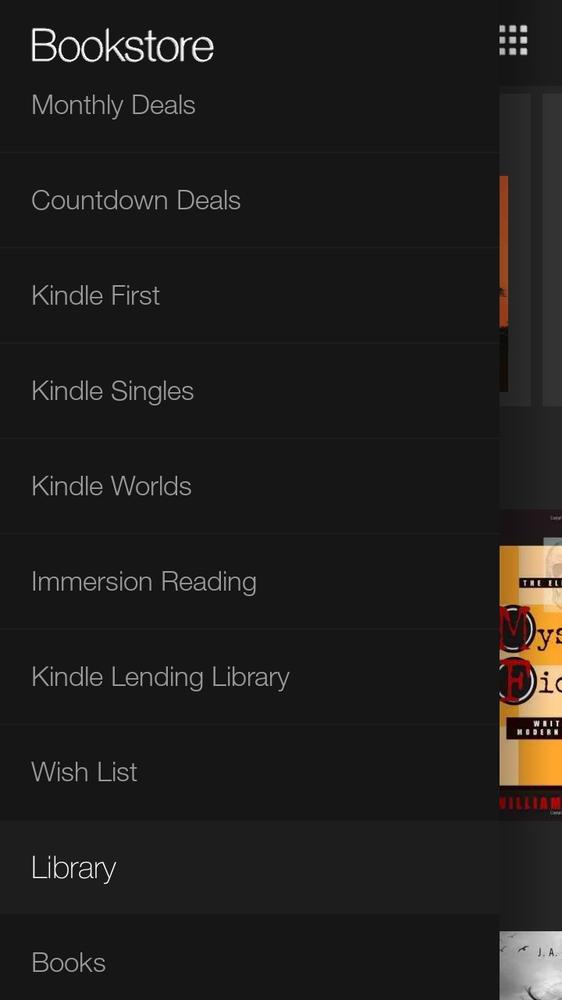

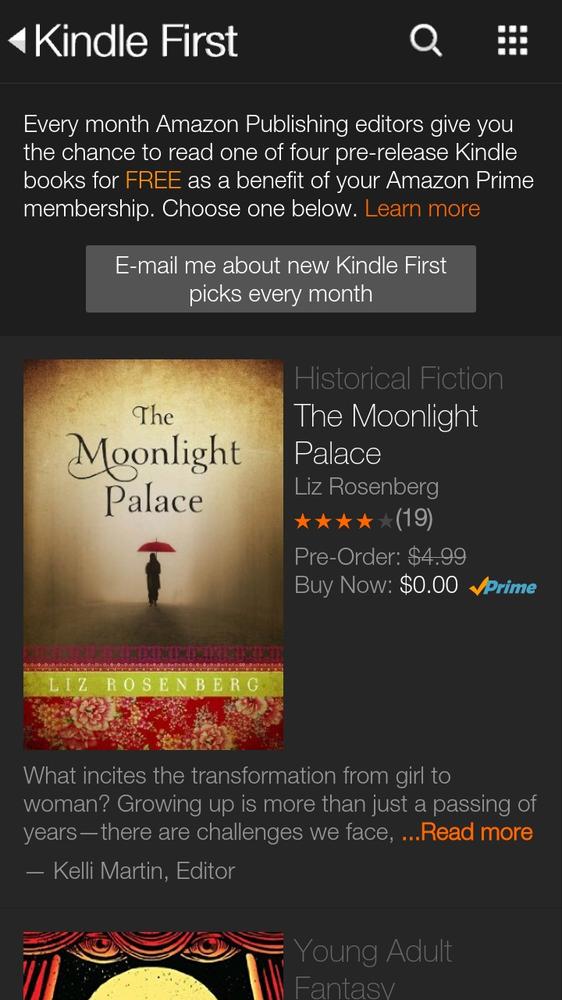
With Kindle First, you can read one of four Kindle books—chosen by Amazon editors—before they’re published. Swipe to reveal the left panel, scroll to Kindle First, and then select a free book. Feel special about getting to read it before everybody else. The books change every month.
Mayday
WHO DOESN’T HATE TECH support? Telephone trees that make you wish you could uproot them, long waits on hold while listening to the kind of music that makes you long for a lobotomy, all to get through to a probably clueless tech support rep.
Amazon’s Mayday feature changes all that. It lets you get live tech support right on your Fire phone. You can see and talk to your tech-support person in real time. These Tech Advisors can draw on your screen to show you what to do, or even take control of your phone and fix the problem right then and there. Don’t worry if you’re asking for tech support in your pajamas—the Tech Advisor can’t see you.
Note
Where does the name “Mayday” come from? It has nothing to do with workers’ holidays or dancing around poles. The word “mayday” signals a distress call from a ship or airplane. It originated from the French term for “help me”—m’aidez, which is pronounced much the same way.
Pull down the Quick Actions panel and tap the Mayday button. From the screen that appears, tap Connect.
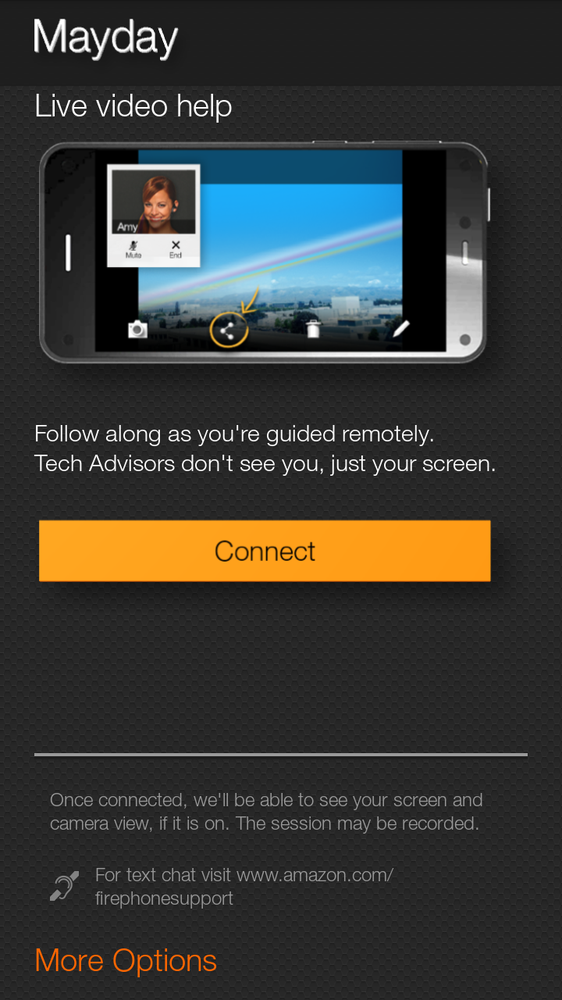
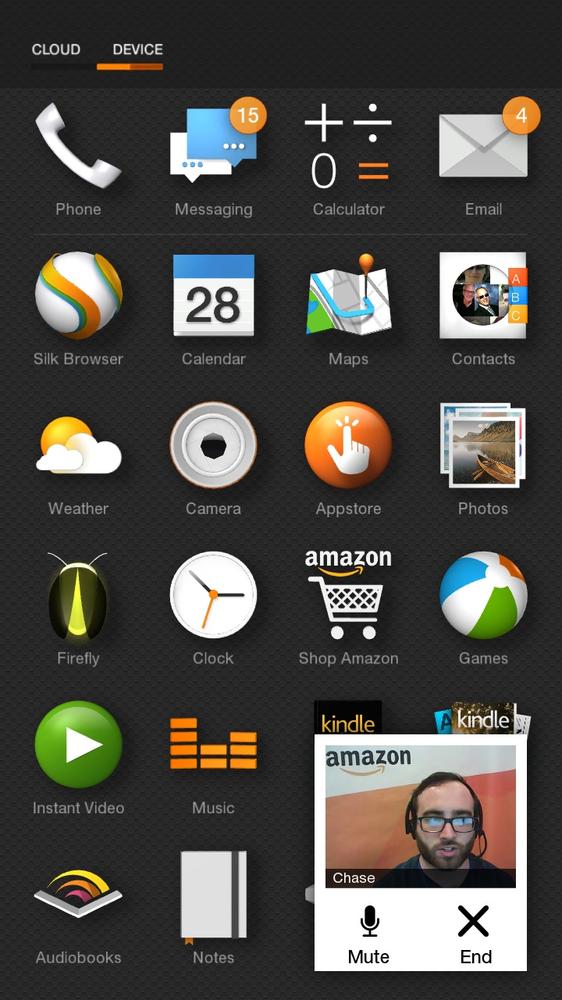
Very soon an Amazon Tech Advisor appears in a video window at the bottom of your screen. Amazon says the wait is usually less than 15 seconds, and people often find that to be the case, although it may take up to 30 seconds. (Sometimes you may not be able to see the tech advisor because of connection issues. In that case, you’ll instead see an icon of a headphone to show there’s no video connection.) Start talking and explain what you need help with. More often than not, a few rounds of questions and answers will solve your problem. (Yes, such kinds of interactions still exist. They’re called conversations.) The Tech Advisor can see your screen, so you can go to where you’re having the problem while you speak.
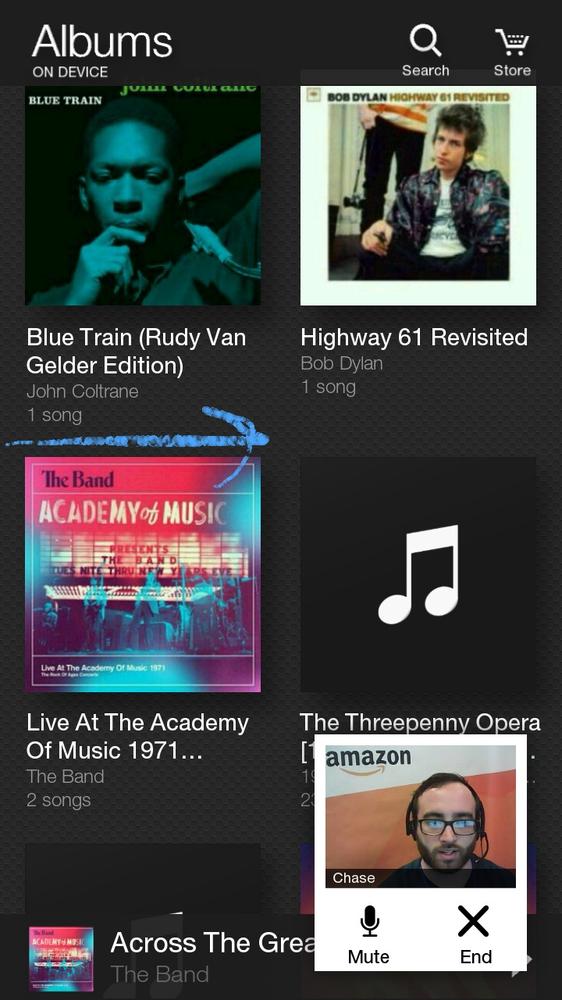
Again, if the Tech Advisor can’t describe the solution in a way you can understand, he can draw right on your screen and show you what to do. For example, say you don’t know how to play your music from the cloud in the cloud player. After you explain that to the Tech Advisor, he may draw a circle around the Music app and tell you to tap it to launch it.
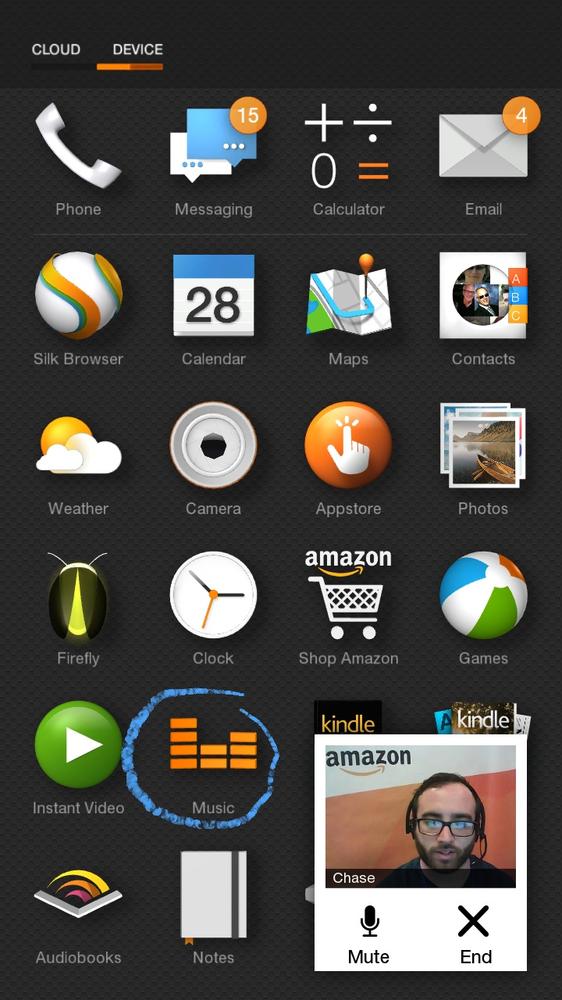
Then, when the Music app launches to the Album view, he may draw an arrow on the screen to show you that you should swipe from the left in order to display the left panel.
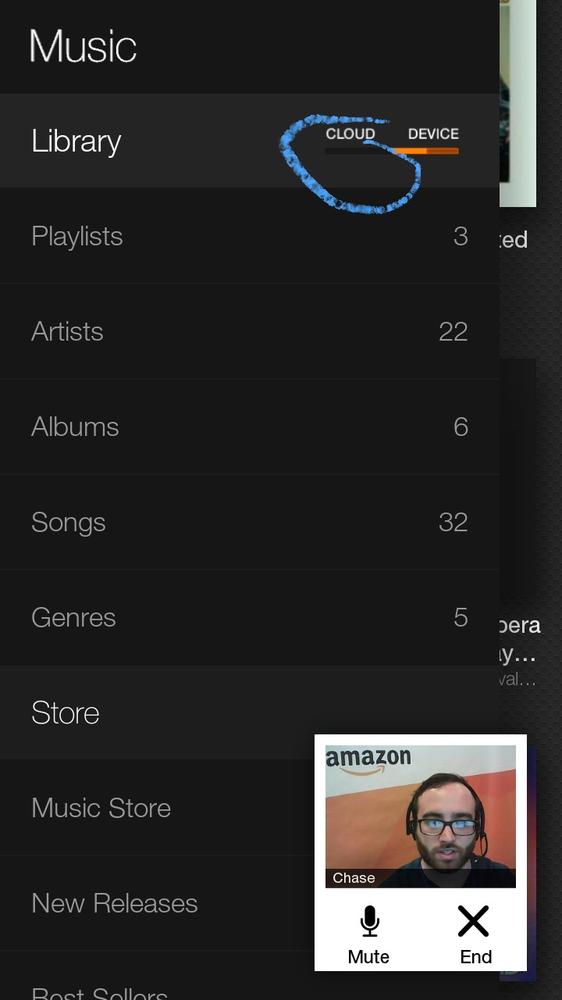
When the left panel appears, he may circle the word “Cloud” at the top and tell you to tap there. That will solve the problem.
Tip
If you don’t get something fixed the first time, ask the Tech Advisor to repeat it. Even if they don’t know the answer immediately, Amazon’s Tech Advisors have for the most part proved to be patient and willing to make every effort to be helpful.
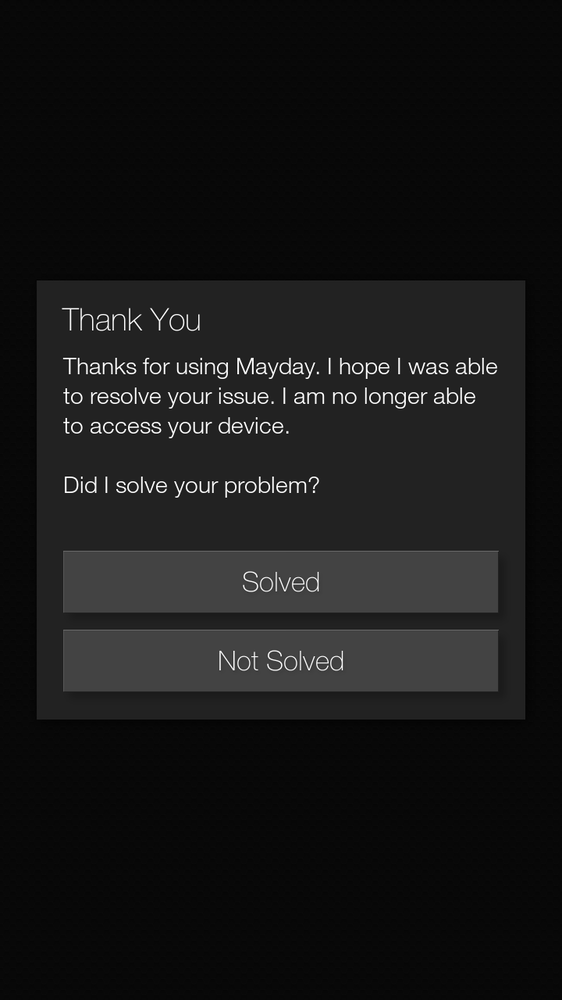
When the problem is solved (or even if it isn’t and you just want to quit), tap the End button below the Tech Advisor to end the session. A screen will appear asking whether your problem was solved.
If that doesn’t work, there’s an even more sophisticated solution. The Tech Advisor can operate your Fire via remote control and show you all the steps you need to take to do something. That way you can see it in action.
Get Amazon Fire Phone: The Missing Manual now with the O’Reilly learning platform.
O’Reilly members experience books, live events, courses curated by job role, and more from O’Reilly and nearly 200 top publishers.

