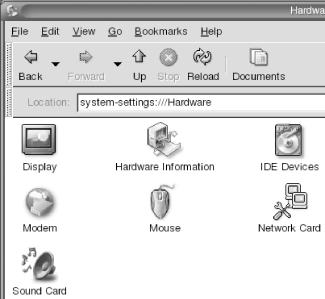
To use your dial-up modem, you must first tell JDS that you have a PC modem. Click Launch → Preferences → System → Hardware, and you will see a screen similar to Figure 4-2.
When you select the Modem icon, you may see a prompt for the root password. If so, enter it as root. The Java Desktop System Configuration Assistant will begin a process to detect your modem. After the detection process, you’ll see a screen similar to Figure 4-3, which shows the name of the name and make of the modem. In this example, the system found a U.S. Robotics modem compatible with Linux.

If you select the Configure button, you will see a screen similar to Figure 4-4. You will need to open this screen if you require a prefix such as 1 or 0 to get an outside line. Only facilities with PBX phone systems require you to use this option.
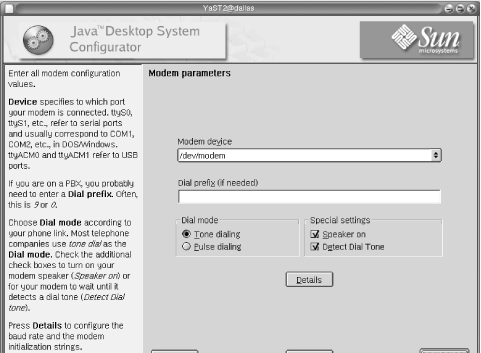
Figure 4-3 shows an area titled Already Configured Devices. If you select the Change button, you have the opportunity to enter your information from your Internet Service Provider.
JDS provides you with a list of service providers, which may include one to which you already subscribe. Figure 4-5 illustrates the screen you will see after pressing the Change button.
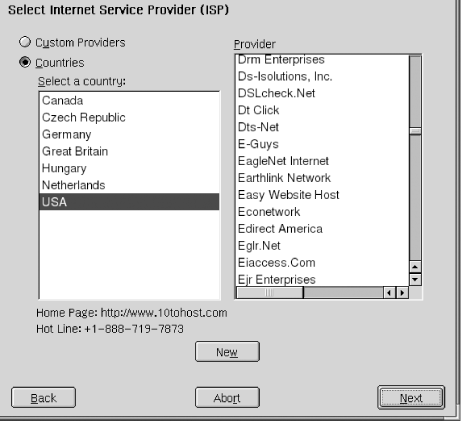
To find your ISP on the list of providers, or if you wish to choose one with whom to sign up, select Next, and a screen like the one in Figure 4-6 assists you in gaining access to an ISP.
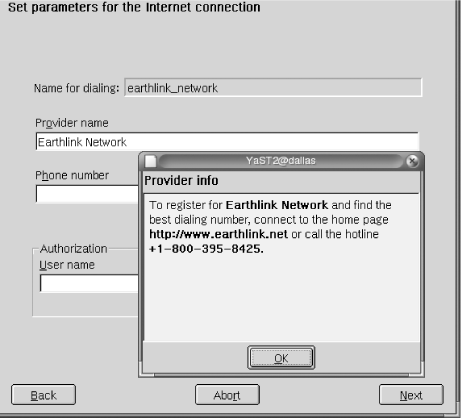
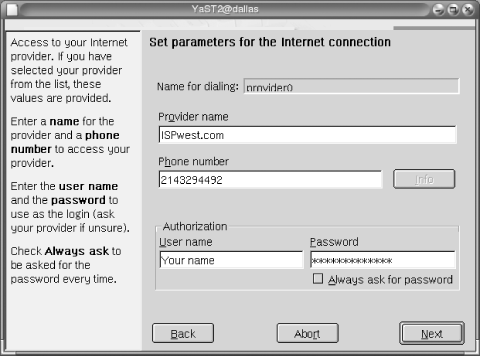
To configure your dial-up account, you will need the information in the sidebar Configuring a Static Address. In the screen shown in Figure 4-7, enter:
Your ISP’s local access phone number
Your Username and Password
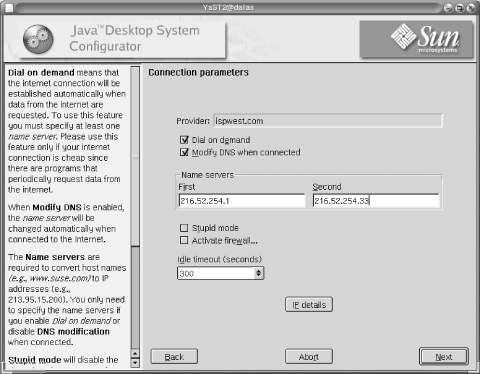
Select the Next button on the lower right. This shows the screen in Figure 4-8, where you need to enter your ISP’s DNS servers.
Next, you will need to complete the screen for your ISP mail services. The Information you need includes:
The incoming mail server address, such as pop3.isp.net or mail.isp.net.
The outgoing SMTP mail server address. That might have the same address as the incoming mail server, or something such as smtp.isp.com.
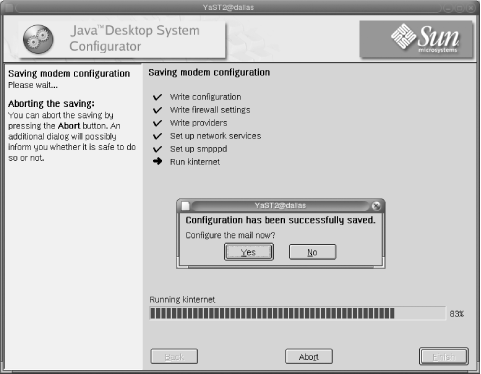
Once you have completed setting up your modem and ISP connectivity, you will see the Java Desktop Configurator saving the modem configuration. Figure 4-9 provides a screenshot of what you will see as JDS completes this task.
JDS uses a program called WvDial to reach the Internet. If you activate the Dial on demand feature as shown in Figure 4-8, your Internet connection starts automatically. For example, when you enter a web address in Mozilla or start email, your system will dial up your Internet provider.
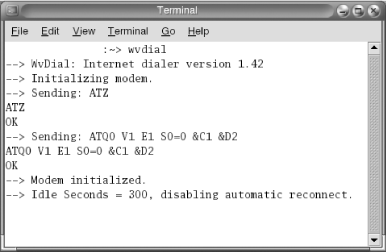
Once you dial up, you remain connected to the Internet. If you do not have unlimited access and need to manage your hours, you may not want to dial in automatically. In that event, you can use WvDial through a terminal.
To initiate a terminal session, select Launch → Applications → System Tools → Terminal, type the command:
wvdial
and press Enter. You should see a dialog similar to the one shown in Figure 4-10.
After connecting to the Internet successfully, you can start using your browser, email, instant messaging, and other Internet utilities.
If you wish to end your connection to the Internet, type:
kill wvdial
Get Exploring the JDS Linux Desktop now with the O’Reilly learning platform.
O’Reilly members experience books, live events, courses curated by job role, and more from O’Reilly and nearly 200 top publishers.

