Bring the Odyssey, Adventurevision, and more back to life on your PC.
I’m starting this chapter off with a few dinosaurs. Odds are you never had one of these machines, and you might never even have known that there were video game systems before Pong and the Atari 2600. It’s unlikely now that you’ll ever find a Magnavox Odyssey game system in the wild (although you might want to try hunting one down [Hack #2] ).
So if you’d like to get a sense of what some of the very first video game systems played like, without breaking the bank buying one or going through the hassle of hooking it up to your modern television set, you might want to try some of the emulators that have been written to mimic the systems. In this hack, I look at how to use your PC to emulate the Odyssey, Entex Adventurevision, and RCA Studio II hardware.
Another hack in Chapter 1 will tell you a bit more about the history of the Odyssey [Hack #2] . There is indeed an emulator that will let you see what the very first video game system looked like on a TV screen. It’s called ODYEMU, and its official home page is http://www.pong-story.com/odyemu.htm.
Tip
The Pong-story web site, where the ODYEMU page is hosted, is an excellent resource center for all things pertaining to the origin of video games, from the legal battles surrounding Magnavox and Atari to the great debate over who really invented video games.
Unlike practically every other console emulator in existence, you don’t need to download any additional software to fully enjoy ODYEMU. Every game program that was released for the system is included in the download on the home page. After you unzip the archive to a new directory, you’re ready to start playing.
Since ODYEMU is written for DOS, you’ll need to run it from the command prompt; non-Windows users can use DOSBox [Hack #68] (some Windows users will get more mileage out of DOSBox [Hack #69] than they will the command prompt). From the Start menu, choose Programs → Accessories → Command Prompt. Use the cd command to move to the directory in which you placed the ODYEMU files; for example, if you put them in the directory \Program Files\earlyemulators\ody\ on your C:\ drive, then type
cd c:\"Program Files"\earlyemulators\ody\and hit Enter. Once you’re in the directory, type dir and hit Enter to see a list of the games available.
Everything with the file extension .MO1 is an Odyssey game cartridge; you can run a cartridge with the command ODYEMU
FILENAME
.M01. Be aware that only a few of the cartridges actually work, and that updates are not forthcoming (the last update to ODYEMU was in 1998). This is because the Odyssey shipped with many different accessories that the games are unplayable without.
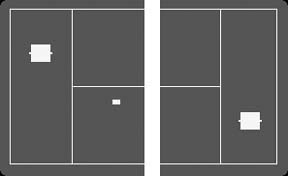
You can still play the very first game of video tennis, though, on CART1.MO1 or TENNIS.MO1. The colored background in the latter (see Figure 4-1) is a replication of the colored acetate overlays that shipped with the Odyssey; you could place them on top of your television screen to have backgrounds and color in your games. How high-tech is that?
The Adventurevision was and is an interesting little piece of hardware. Released in 1982 by a company called Entex, it was one of the first portable game systems. Shaped roughly like a miniature arcade game that sat on a table or shelf, it featured its own screen made up of a matrix of red LED lights. (Ten years later, Nintendo would try something similar with the Virtual Boy, but we don’t talk about that.)
Unfortunately for collectors of video game obscurities, the Adventurevision didn’t last long on the market, released as it was just before the great 1983 market crash. There were only four games released for it: Defender, Space Force, Super Cobra, and Turtles. Games and system are all extremely rare and pricey. But if you want to check out what it was like, there is indeed an Adventurevision emulator out there.
Specifically, Adventurevision is one of the systems emulated in that great Multi-Emulator Super System, a.k.a. MESS. MESS functions much like MAME (the Multiple Arcade Machine Emulator, covered in depth in Chapter 3), except that it emulates console systems instead of arcade hardware. You can get it from the official home page at http://www.mess.org. Much like MAME, there are command-line (DOS-style) and GUI (Windows-style) versions of MESS; I recommend the GUI version for its ease of use.
Open the MESS Zip file and extract its contents to a new directory on your hard drive. The messgui.exe file that you see is what you’ll want to run to start MESS, but before you do that you’ll need to download the Adventurevision BIOS ROM (software required by MESS before it can emulate the system) and one or more games. You can find the BIOS, as well as the system’s entire extensive (cough) library at http://adventurevision.com/tech.html.
This gets a bit tricky, so pay close attention. Don’t unzip the BIOS ROM— simply save it to the bios\ directory that was automatically created when you extracted the MESS archive. But do extract the ROM file from its Zip archive. You’ll see a software\ directory under your main MESS folder. Within that directory, create a new folder called advision\. Then extract the contents of the Zip files to that folder.
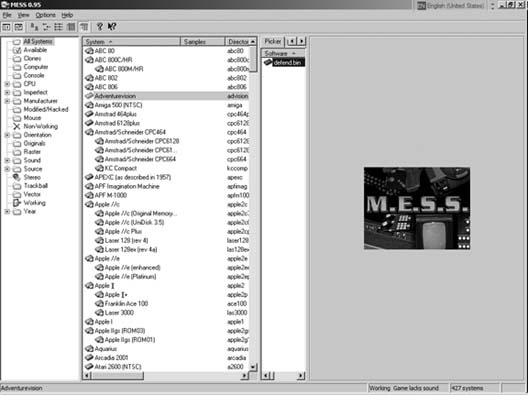
If you think you’ve got all this straightened out, run messgui.exe. You’ll soon see something like Figure 4-2.
Before you start playing, you might want to check out the options menu. It is very similar to (you guessed it) MAME’s. One important option you might want to turn on is the ability to run the game in a window rather than blown up to the size of your monitor. Looking at what is supposed to be a small screen full of tiny red dots can be a bit unplayable when it’s a giant screen full of enormous red dots.
Click Options, then Default Game Properties, then the Display tab. Uncheck the “Start out maximized” box, then check “Run in a window.” (If you want to apply this setting to the Adventurevision only, leaving all other emulators at full screen, just right click on the Adventurevision line in the middle window, then follow the same instructions.)
Having set that option (or left it at the default eye-bending setting, if you so chose), let’s play. If you’ve got the BIOS ROM in the right place and a game ROM all unzipped and ready to go, you should have no problem from here. Starting from the leftmost window and working your way to the right, click “All Systems,” click “Adventurevision,” then double-click “defend.bin” (or whatever game you installed).
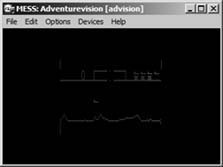
After proceeding through some introductory screens you’ll see the game boot up, similar to what’s shown in Figure 4-3. Enjoy!
Tip
MESS emulates many classic video game systems, but what a lot of people use it for is emulating old personal computers. See “Emulate Other Classic Computers” [Hack #59] to make an even bigger MESS.
Here’s a system responsible for more than a few teary Christmas mornings. Not tears of joy, of course—tears of anger, frustration, and deep sorrow that Santa had brought an RCA Studio II setup instead of an Atari 2600. Featuring ugly, blocky black-and-white graphics, a dreary lineup of software, and—worst of all—number pads in place of joysticks, the Studio II might be the worst video game system ever created.
And some brave soul wrote not only an emulator, but actual homebrew software for the thing.
How could I not mention this act of self-abuse, performed as it was in pursuit of the emulation hacker ideal? If you want to check out STEM, as the emulator is called, you can download it from designer Paul Robson’s home page at http://www.classicgaming.com/studio2/. While you’re there, you can grab ROM files of five of the games the system ran, plus three homebrew titles all created by Robson.
If you’re running Windows, you’ll want to download WinSTEM. There are two DOS versions of the emulator, one written in C and the other in Assembler. The Assembler version features a debug option in case you want to try your hand at developing Studio II titles. A wealth of technical manuals and information is also available on the site.
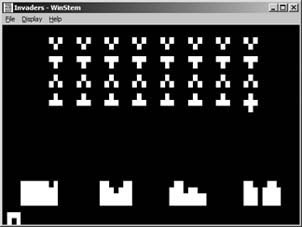
Unzip WinSTEM and any ROM files into the same directory, then run winstem.exe. Click File, then Open to load up the game (see Figure 4-4), and have fun (or not)!
Get Retro Gaming Hacks now with the O’Reilly learning platform.
O’Reilly members experience books, live events, courses curated by job role, and more from O’Reilly and nearly 200 top publishers.


