Aliases: Icons in Two Places at Once
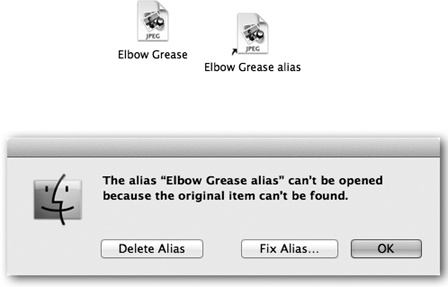
Highlighting an icon and then choosing File→Make Alias (or pressing ⌘-L) generates an alias, a specially branded duplicate of the original icon (Figure 2-7). It’s not a duplicate of the file—just of the icon; therefore it requires negligible storage space. When you double-click the alias, the original file opens. (A Macintosh alias is essentially the same as a Windows shortcut.)

Figure 2-7. Top: You can identify an alias by the tiny arrow badge on the lower-left corner. (Longtime Mac fans should note that the name no longer appears in italics.) Bottom: If the alias can’t find the original file, you’re offered the chance to hook it up to a different file.
You can create as many aliases as you want of a single file; therefore, in effect, aliases let you stash that file in many different folder locations simultaneously. Double-click any one of them, and you open the original file, wherever it may be on your system.
Tip
You can also create an alias of an icon by Option-⌘-dragging it out of its window. (Aliases you create this way lack the word alias on the file name—a delight to those who find the suffix redundant and annoying.) You can also create an alias by right-clicking (or two-finger clicking) a normal icon and choosing Make Alias from the shortcut menu that appears, or by highlighting an icon and then choosing Make Alias from the menu.
What’s Good ...
Get OS X Mavericks: The Missing Manual now with the O’Reilly learning platform.
O’Reilly members experience books, live events, courses curated by job role, and more from O’Reilly and nearly 200 top publishers.

