Printing Photos with EasyShare
EasyShare makes printing your photos, well, easy. You need to make a few choices about the size of your photos, how many prints you need, and the photo paper you’re using. In exchange, EasyShare handles some of the more detailed, behind the scenes work. You’ll get the best results if you pay attention to the three details listed in the previous section: the resolution of your images, the settings on your printer, and your choice of paper.
When you’re ready to start, just follow these steps:
On the My Collection tab, select the photo you want to print.
To choose multiple photos, click the checkbox icon above the task window after you select each photo in the main window. (Alternatively, select a group of photos and then click the checkbox icon.) As you make your selections, your chosen photos gather in the task window.
Once you’ve selected your photos, click the Print at Home tab.
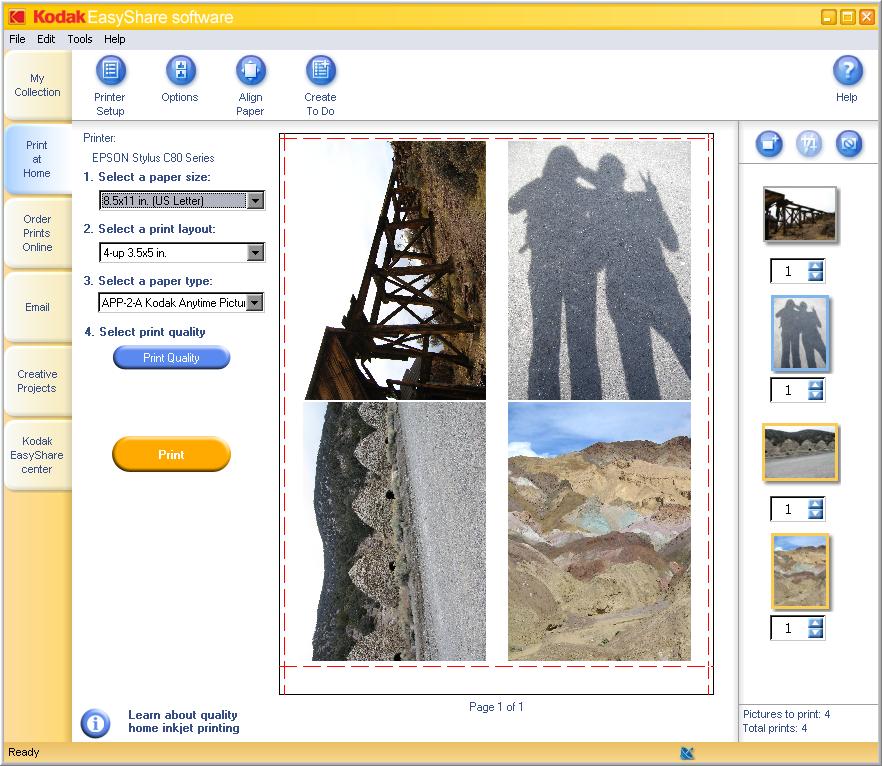
The screen shown in Figure 16-2 appears.

Figure 16-2. The Print at Home tab shows you a preview of the printed page. Use the drop-down menus to set up the page layout for printing. EasyShare provides several choices for printing more than one photo to a sheet. Click the Print Quality button to tweak your printer settings; the options available vary from one printer to another.
Tip
As you select photos, consider details like the size of your prints and what type of photo paper ...
Get Digital Photography: The Missing Manual now with the O’Reilly learning platform.
O’Reilly members experience books, live events, courses curated by job role, and more from O’Reilly and nearly 200 top publishers.

