A layer is a named sequence of frames in the timeline. When you work with a single layer, adding content to frames is easy: You just click a keyframe and use Flash's drawing, painting, and text tools to create an image on the stage. But when you work with multiple layers, you need to keep track of the layers' order and what objects are on each layer. For example, suppose you're creating a composite drawing with mountains in the background, a car driving by in the foreground, and a separate layer for your sound clips. You may find adding content a bit trickier, because you have to be aware of the layer to which you're adding your content. Fortunately, as you see in the steps below, the timeline's Show/Hide icon helps you keep track of which content you've placed on which layer.
To add content to multiple layers:
Open the file 04-1_Multiple_Layers.fla.
You can find this file (and all the other example files) on this book's Missing CD page at www.missingmanuals.com/cds.
Click the first keyframe in Layer 1.
Flash highlights the selected frame, as well as the layer name. You also see a little pencil icon that lets you know this frame is now ready for editing.
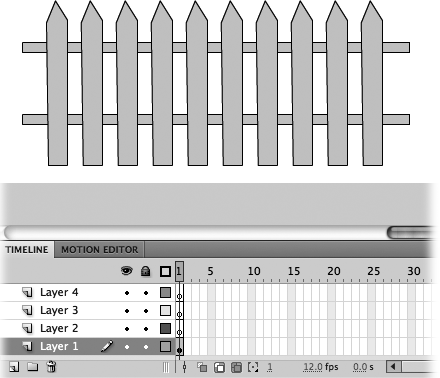
Use Flash's drawing and painting tools to draw a fence on the stage.
Your fence doesn't have to be fancy; a quick "wooden" fence like the one in Figure 4-7 is fine.
Hide Layer 1 by clicking the Show/Hide button next to Layer 1.
The content on the stage temporarily disappears. Flash replaces the Show/Hide icon with an X and draws a slash through the pencil icon next to Layer 1 to let you know this layer is no longer editable.
Note
Technically, you don't have to hide the contents of one layer while you're working with another; in fact, in some cases, you want to see the contents of both layers on the stage at the same time (Showing and Hiding Layers). But for this example, hiding is the best way to go.
Click the first keyframe in Layer 2.
Flash highlights the selected frame, as well as the layer name (Layer 2). Now the pencil icon is next to Layer 2.
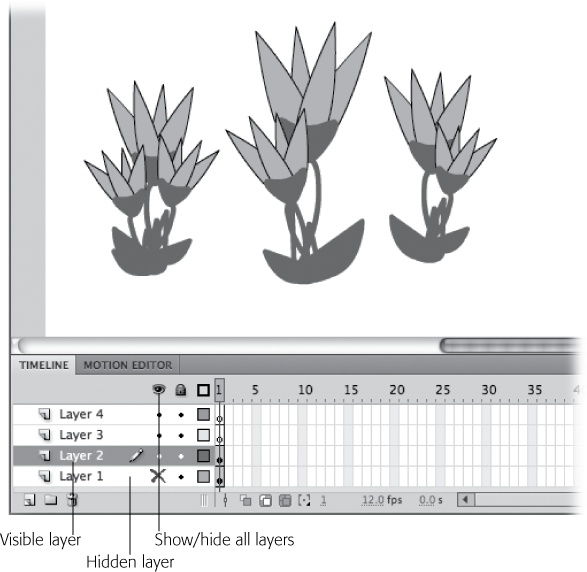
Use Flash's drawing and painting tools to draw a few flowers on the stage.
Your workspace should now look like the one in Figure 4-8.
Figure 4-8. Sometimes you want to see the frame contents of two or more layers at the same time, like when you're trying to line up objects in multiple layers. But sometimes seeing all those different objects on the same stage is just plain confusing—partly because Flash lets you edit only one layer at a time. Here, the fence in the first frame of Layer 1 is hidden (you can tell by the big X in the Show/Hide column) so you can focus on the contents of Layer 2 (the flowers).
Hide Layer 2 by clicking the Show/Hide icon next to Layer 2.
The content on the stage temporarily disappears. Flash replaces the Show/Hide icon with an X and draws a slash through the pencil icon next to Layer 2 to let you know that this layer is no longer editable.
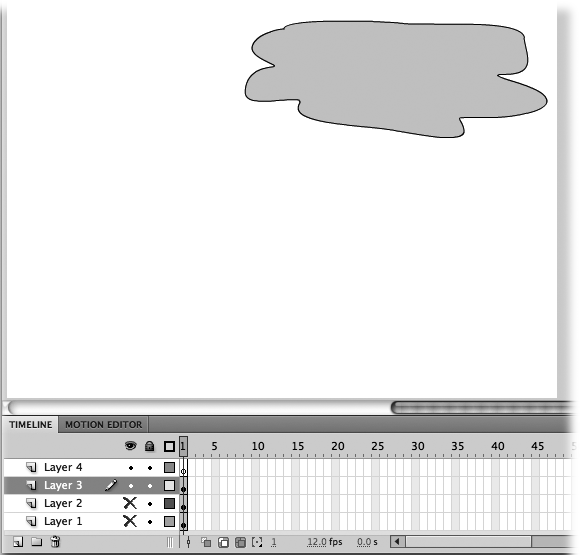
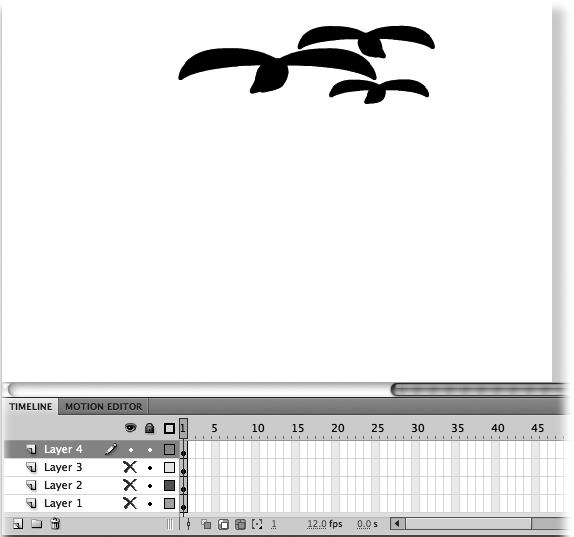
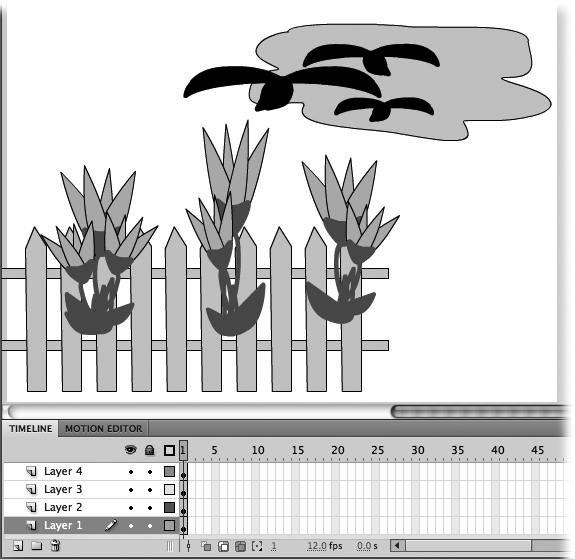
Repeat steps 4–6 for Layers 3 and 4, adding some gray clouds to Layer 3 (Figure 4-9) and some flying birds to Layer 4 (Figure 4-10).
To see the content for all four layers, click to remove the Show/Hide X icon next to Layer 3, Layer 2, and Layer 1, as shown in Figure 4-11.
Flash displays the content for all four layers on the same stage.
Figure 4-9. Creating separate layers for different graphic elements gives you more control over how each element appears in your finished animation.
Figure 4-10. In this example, the images are static, but you can place everything from Motion and Shape tweens to movie clips, backgrounds, actions, and sounds on their own layers. Hiding layers affects only what you see on the stage; when you select Control→Test Movie to test your animation, Flash displays all the layers, whether or not you've checked them as Hidden.
Figure 4-11. Here's what the composite drawing for Frame 1 looks like: the fence, the flowers, the cloud, and the birds, all together on one stage. Notice the display order: The flowers (Layer 2) appear in front of the fence (Layer 1), and the birds (Layer 4) in front of the cloud (Layer 3). You can change the way these images overlap by rearranging the layers, as you see on page 139.
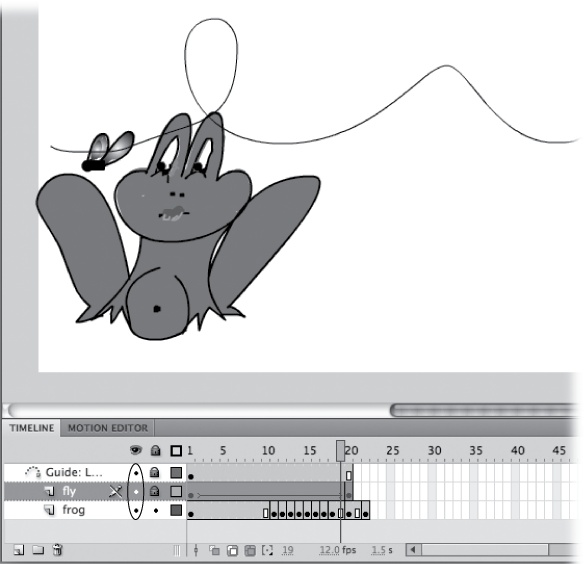
This section shows you how to use Flash's layer tools (including locking/unlocking and hiding/showing) to keep from going crazy when you're editing content in multiple layers (Figure 4-12). (Two layers aren't so bad, but if you need to add six, eight, 10, or even more layers, it's pretty easy to lose track of which layer you're working in.) Then in the following section you'll see how to edit the content in your layers.
Figure 4-12. This animation contains three layers: one containing a Motion tween of a buzzing fly, one containing the path the fly takes as it buzzes around the frog's head, and one containing the highly interested frog. In some situations, showing all layers is fine, but here it's confusing to see all those images on the stage at the same time.
Whether or not you want Flash to show the contents of your layered frames on the stage depends on the situation. Typically, when you're creating the content for a new layer, you want to hide all the other layers so you can focus on what you're drawing without any distractions. But after you've created a bunch of layers, you're probably going to want to see them all at once so that you have an idea of what your finished animation looks like and make adjustments as necessary.
Flash shows all layers until you tell it otherwise.
Tip
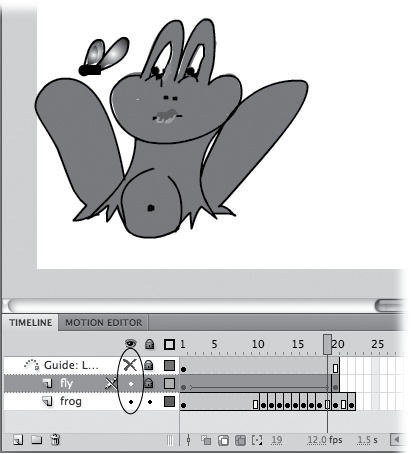
You can tell Flash to show (or hide) all your layers by clicking the Show/Hide All Layers icon you see in Figure 4-8. Click the icon again to turn off showing (or hiding).
The eyeball in the timeline is the Show or Hide All Layers button. It works like a toggle. Beneath that eye are buttons to show or hide layers individually. So to hide a single layer, click the dot in that layer. When you do, Flash replaces the dot with a red X and temporarily hides the contents of the layer (Figure 4-13).
In the timeline, click the X in the layer you want to show. When you do, Flash replaces the X with a dot and displays the contents of the layer on the stage.
In the timeline, Alt-click (Option-click) the Show/Hide button next to the layer you're editing. Flash immediately hides (or shows) all the layers, except the one you're editing.
Tip
If you try to edit a hidden layer by drawing on the stage, Flash displays a warning dialog box that gives you the opportunity to show (and then edit) the layer. Not so if you try to drag a symbol onto the stage—Flash just refuses to let you drop the symbol on the stage. Oddly enough, however, Flash does let you add and remove frames and keyframes in a locked layer.
The more layers you have, the more important it is to keep them organized. In this section, you'll see how to give your layers meaningful names so you'll know which images, sounds, or actions they hold. You'll learn how to arrange your layers so that your images and objects overlap the way you want. And you'll learn how to copy and paste layers, an important skill that saves time and cuts down on repetitive tasks.
The names Flash gives the layers you create—Layer 1, Layer 2, Layer 3, and so on—aren't particularly useful when you've created 20 layers and can't remember which layer contains the ocean background you spent 10 hours drawing. Get into the habit of renaming your layers as soon you create them, and you'll have an easier time locating the specific elements you need when you need them.
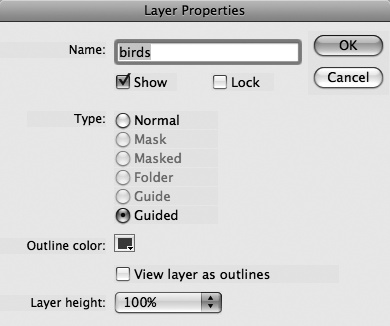
Figure 4-14. When you open the Layer Properties dialog box, you've got all the layer settings in one place. You can change the layer name; show, hide, or lock your layer; and much more.
This section builds on the example you created earlier in this chapter. If you haven't had a chance to work through that section, you can download 04_2_Flowers.fla from this book's Missing CD page (www.missingmanuals.com/cds) and use it instead.
To rename a layer:
Open the file 04_2_Flowers.fla.
If you created your own Flash document when you worked through Working with Multiple Layers, you can use that document instead.
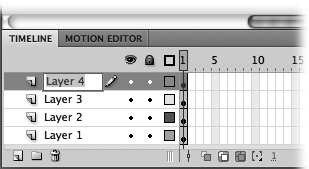
Double-click the name Layer 4.
Flash displays the layer name in an editable text box (Figure 4-15). On the stage, you see the content for this layer (the birds) selected.
Figure 4-15. If you can't remember what a particular layer contains, then check the stage: When you double-click a layer name to rename it, Flash automatically highlights the content associated with that layer.
Note
Instead of double-clicking the layer name, you can use the Layer Properties dialog box to rename your layer. Check out the box on Why Layer? for details.
Click inside the text box, type birds, and then click anywhere else in the workspace.
Flash displays the new name for your layer.
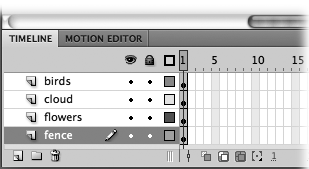
Repeat steps 1 and 2 for Layers 3, 2, and 1, renaming them cloud, flowers, and fence, respectively.
When you're done, your renamed layers should look like Figure 4-16.
Earlier in this chapter, you saw how to copy and paste individual series of frames. But Flash also lets you copy and paste entire layers—useful when you want to create a backup layer for safekeeping or when you want to create a duplicate layer you'll later change slightly from the original.
For example, if you want your animation to show an actor being pelted with tomatoes from different angles, you can create a layer that shows a tomato coming in from stage right—perhaps using a Motion or Shape tween (Chapter 3). Then you can copy that layer, paste it back into the Layers window, rename it, and tweak it so that the tomato comes from stage left. Maximum effect for minimum effort—that's what copying and pasting gives you.
To copy and paste a layer:
In the timeline, click the name of the layer you want to select.
Flash highlights the layer name, as well as all the frames in the layer.
Select Edit→Timeline→Copy Frames.
If you don't have a layer waiting to accept the copied frames, then create a new layer now before going on to the next step.
In the Layers window, select the name of the destination layer. Then choose Edit→Timeline→Paste Frames.
Flash pastes the copied frames into the new layer, beginning with the first frame. It also pastes the name of the copied layer into the new layer.
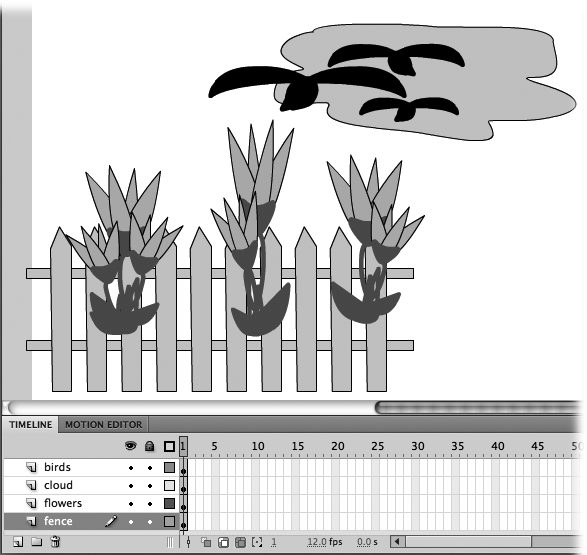
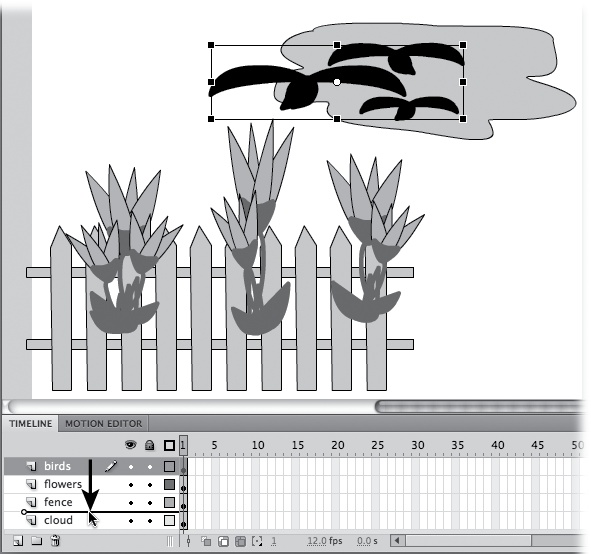
You can change the way images, text fields, and other objects overlap on the stage by rearranging the layers in the timeline. For example, in Figure 4-17, the fence seems to be behind the flowers because, in the timeline, the fence layer is below the flowers layer. If you'd rather have the flowers behind the fence, just drag the flowers layer below the fence. Figure 4-18 shows you an example.
Figure 4-17. Flash treats layers the same way you treat a stack of transparencies: The image on the bottom gets covered by the image above it, which gets covered by the image above it, and so on. Stacking isn't an issue if none of your images overlap. But when they do, you need to decide which layers you want in front and which behind.
Figure 4-18. Moving a layer is easy: Just click to select a layer, and then drag it to reposition it (and change the order in which Flash displays the content of your frames). Here, the cloud layer has been moved to the bottom of the list, so it now appears behind the other images. The birds layer is in the process of being moved; you can tell by the thick gray line you see beneath the cursor.
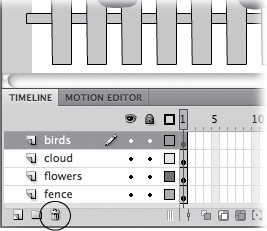
Flash gives you three ways to delete a layer:
In the timeline, right-click (Control-click) the layer you want to delete and then, from the shortcut menu that appears, choose Delete Layer.
Drag the layer you want to delete to the trash can (see Figure 4-19).
Click the layer you want to delete to select it (or Shift-click to select several layers), and then click the trash can.
Whichever method you choose, Flash immediately deletes the layer or layers (including all the frames associated with that layer or layers) from the Layers window.
Working with layers can be confusing, especially at first. So Flash lets you lock individual layers as a kind of safeguard, to keep yourself from accidentally changing content you didn't mean to change:
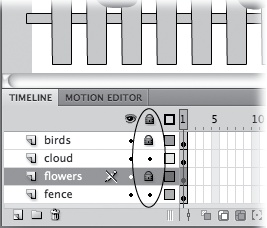
To lock a layer, click the dot under the padlock, as shown in Figure 4-20. When you do, the dot turns into a little padlock icon and deselects any objects that you'd selected on the stage in that layer. If you locked the active layer, Flash draws a slash through the pencil icon next to the layer's name as a visual reminder that you can't edit it.
To unlock a layer, click the padlock (Figure 4-20). Instantly, the padlock turns into a dot, Flash reselects your objects, and you can edit them once again on the stage.
To lock (or unlock) all your layers all at once, click the Lock or Unlock All Layers icon (padlock at the top). Click the icon again to return to unlocked (or locked) layers. Ctrl-clicking (⌘-clicking) on any Show/Hide button also locks or unlocks all layers.
.To lock (or unlock) all layers except one, Alt-click (Option-click) the dot or padlock in the layer you want to edit.
Get Flash CS5: The Missing Manual now with the O’Reilly learning platform.
O’Reilly members experience books, live events, courses curated by job role, and more from O’Reilly and nearly 200 top publishers.
