Drawing Paths with the Pen Tool
The Pen tool made its debut in Adobe Illustrator way back in the late ’80s, and offered people precision and control the likes of which they’d never seen. The only problem was that the tool was (and still is) darn hard to use. It was met with all kinds of resistance from the artistic community because it didn’t conform to the way folks were used to working with digital graphics (not to mention pens and pencils). Instead of dragging to draw a line, with the Pen tool you create anchor points and control handles, which are collectively referred to as vector paths or Bézier curves (named for their inventor). The handles aren’t actually part of the line; they’re little levers you use to control each line segment’s curvature (see Figure 14-3).
As you learned back in Chapter 3, you can edit and resize vectors without losing quality. For example, you can adjust an object’s points and paths (see Figure 14-3, bottom) to tweak its shape and then use Free Transform to resize, rotate, distort, warp, or flip the object. When it’s just right, you can fill the shape with color, trace its outline with one of the painting tools, or use it to create a mask.
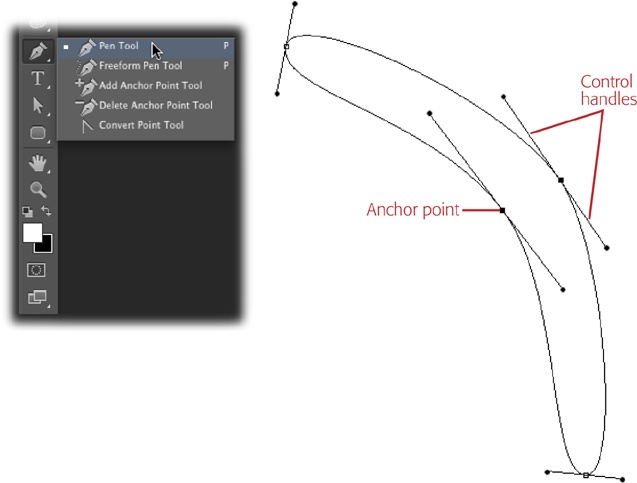
Figure 14-3. Top: The mighty Pen tool lives near the bottom of the Tools panel (when it’s in single-column mode, that is). Bottom: This boomerang shape is made from a series of points and paths. The points mark the beginning ...
Get Photoshop CC: The Missing Manual now with the O’Reilly learning platform.
O’Reilly members experience books, live events, courses curated by job role, and more from O’Reilly and nearly 200 top publishers.

