USING CAMERA RAW TONE CURVES FOR MORE CONTROL
The tonal controls of Camera Raw’s Basic tab redistribute linear
RAW data produced by digital cameras into a form pleasing to the
eye. You can get even more control over how this data is mapped
with the Camera Raw tone curves. You have two tone curves to
choose from: Parametric and Point. Let’s see how they work.
Using Camera Raw
Tone Curves for
More Control
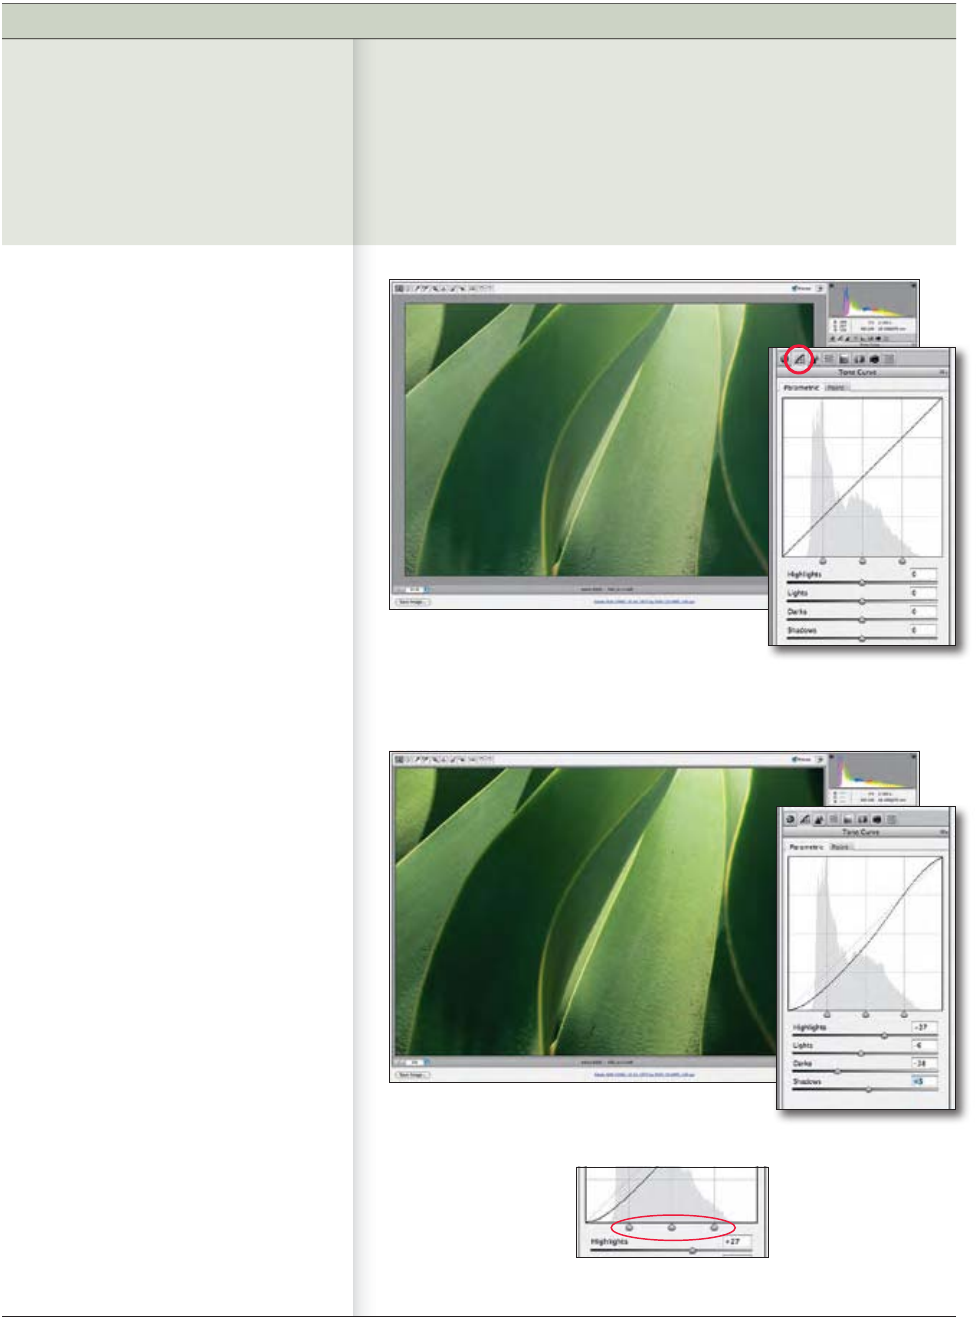
It’s generally recommended that you first
do your major editing in the Basic tab,
then use either the Parametric or Point
tone curves for fine tuning. You get to the
tone curves by clicking on the Tone Curve
icon (circled in Figure 7-1).
You’ll see two tabs: Parametric and Point.
Let’s start with the Parametric tone curve.
Using the Parametric Tone Curve
Just as with Photoshop’s Curves, the
horizontal axis represents the original
intensity values of the pixels, and the
vertical axis represents the new tonal
values.
With the Parametric tone curve, you
basically work with four set points:
Highlights, Lights, Darks, and Shadows.
Instead of placing a multitude of points
on the curve and dragging the curve to
a desired position, like you do with the
Point tone curve, you control the tonal
values with the sliders found under the
graph. What’s lacking in detailed control
is more than made up for in ease of use.
In Figure 7-2, I’ve adjusted the sliders to
produce a wide ...


