USING CAMERA RAW’S GRAYSCALE MIX
Using Camera Raw’s
Grayscale Mix
Camera Raw’s new Grayscale Mix controls, found under the
HSL/Grayscale tab, have revolutionized digital black and white
conversion. Since using these controls, I’ve retired several of my
more complex and time-consuming conversion techniques.
Once you use the Grayscale Mix controls, you’ll see what I mean.
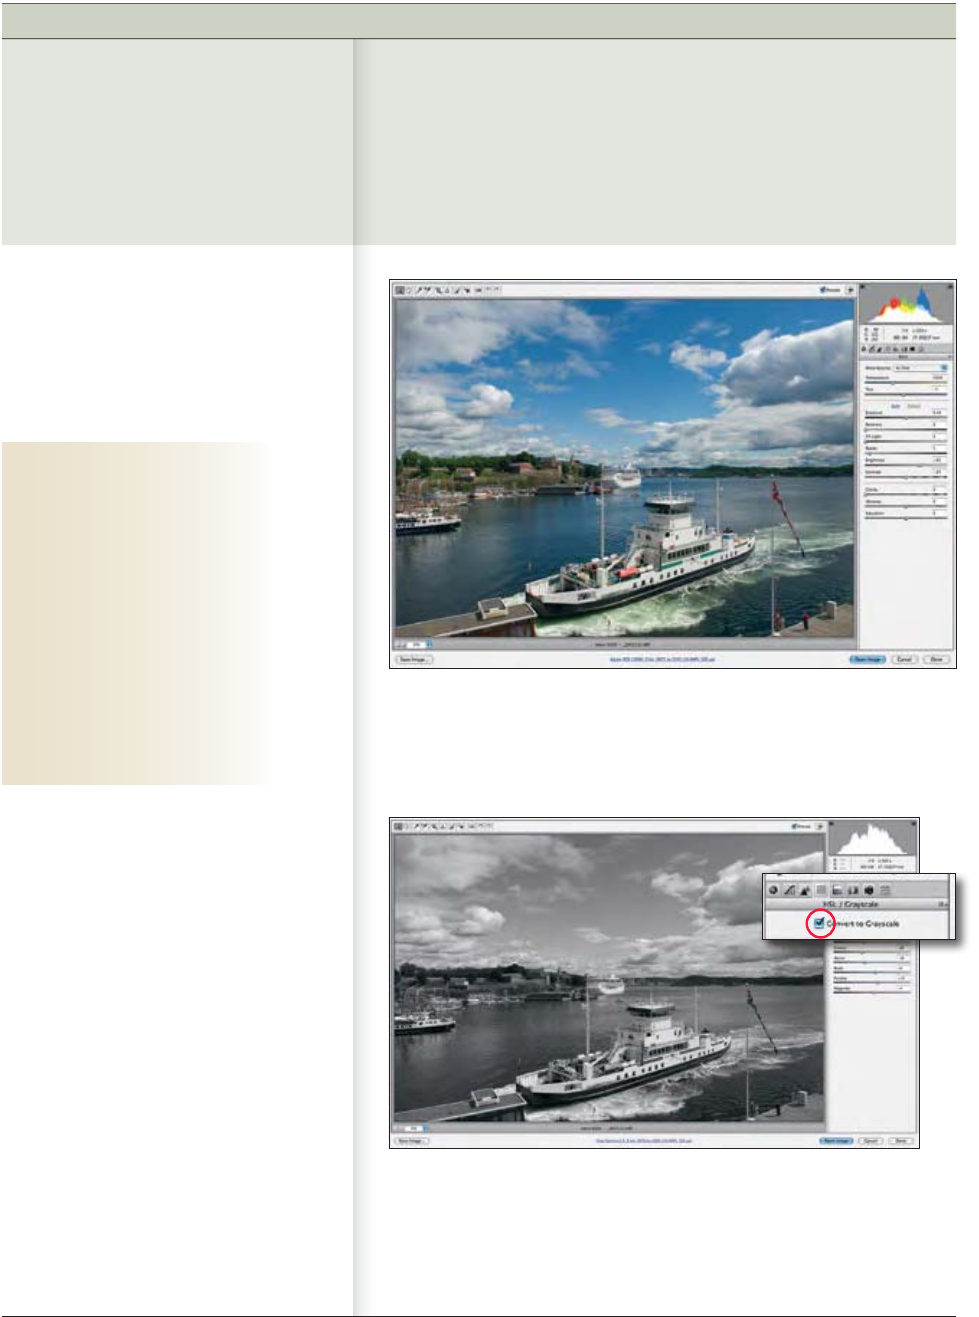
To start, you need a color image. From
a quality point of view, it’s preferable to
work with a native RAW file like the one
in Figure 10-1, but a JPEG, TIFF, or PSD file
will do, as long as it is in color.
Click the checkbox next to the words
Convert to Grayscale (circled in Figure
10-2) in the HSL/Grayscale tab. Your image
will appear unsaturated, but what you see
is misleading. The underlying color data
is still available, which means you can use
Camera Raw’s Grayscale Mix control to
determine how each color is converted.
If you save your image as a TIFF, JPEG,
or PSD, all color data is eliminated, even
though it is saved in Adobe RGB via the
Workflow Options dialog box. If you save
your converted image as a DNG file, the
color is retained regardless of how you
set your Workflow Options and can be
retrieved, if necessary, in other programs
such as Photoshop.
NOTE Many digital cameras now
offer a Black and White option.
Camera Raw’s Grayscale Mix control
won’t have any effect on these
images, unless ...


