ABOUT CHROMATIC ABERRATIONS
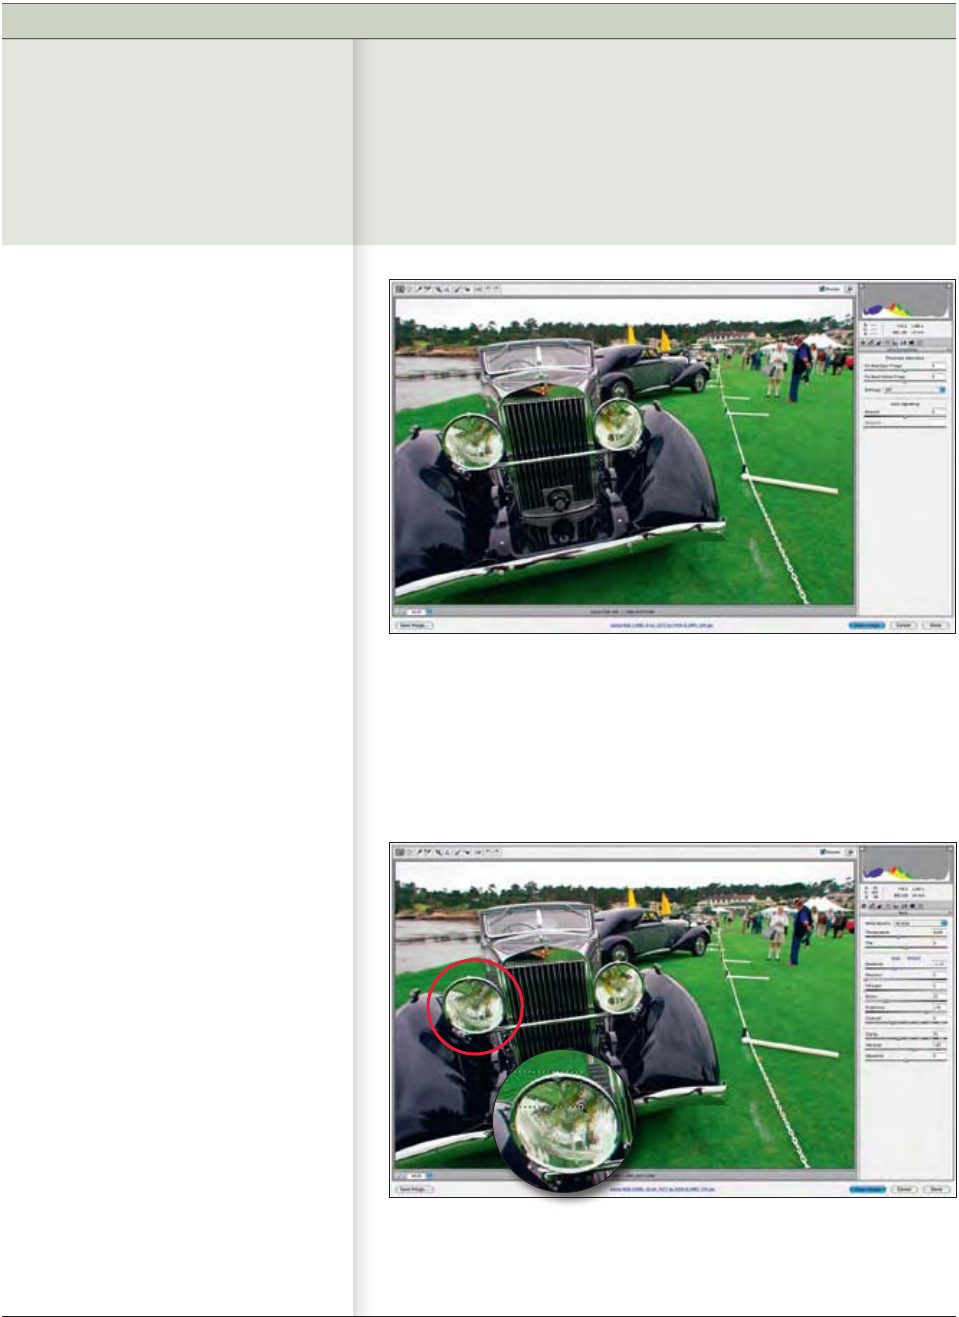
Figure 9-29 shows a shot taken by
professional photographer Richard
Morgenstein with a Canon 10D and a
14mm wide-angle lens. Although the
chromatic aberrations are not visible at
first glance, magnification will probably
show some annoying anomalies in the
edges of the chrome headlights.
Reducing Chromatic Aberrations with
Camera Raw
To use Camera Raw to reduce chromatic
aberrations in images such as this:
Identify a likely area near the outer 1.
perimeter of a likely candidate. An
example would be an image shot with
a wide angle lens in bright lighting
conditions with sharp edge detail.
Magnify the area using Camera Raw 2.
navigation tools. Select the Zoom tool
and hold your cursor over the area
you wish to magnify. Click and drag a
rectangle around the area you wish to
magnify, as enlarged in Figure 9-30,
then release the mouse.
In the magnified image shown in 3.
Figure 9-31, you can clearly see the
color fringing so typical of this type
of chromatic aberration. (When light
passes through glass, different color
wavelengths are sometimes separated
and shifted in focus ever so slightly. To
visualize this, think of a common prism
and the rainbow it produces. This shift
Chromatic aberrations show up as anomalous color shifts,
mostly on the outer perimeter of images, in areas with distinct
edge transitions. They are common when wide-angle ...


