ADVANCED LOCALIZED CONTROL
The methods I’ve shown you so far apply a global eect over
the entire image. For some images this is ne, but for others, it’s
helpful to paint the eects into specic areas. This takes time,
and requires more advanced Photoshop skills. But the tradeo
in time is more than made up for in the control you gain.
Advanced Localized
Control
Here is a fairly straightforward way to use
Photoshop, Bridge, and Camera Raw to
create a black and white image and apply
localized control. (You can also use the
method to fine-tune split toning effects.)
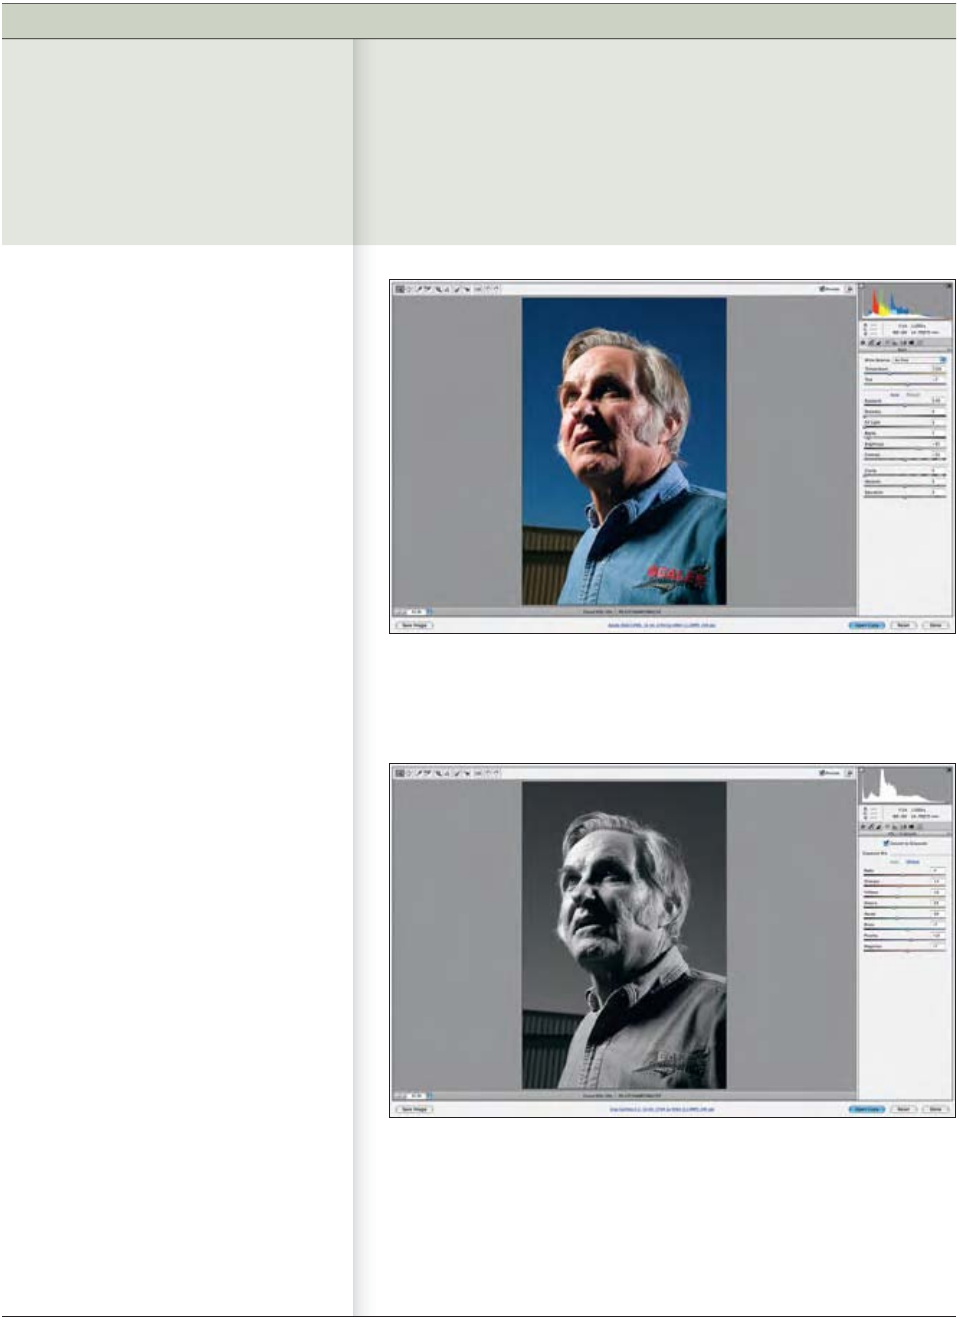
Improving a Portrait Shot
I’ll use the portrait in Figure 10-35—shot
by Popular Science photographer John
Carnett—of Burt Rutan, the aerospace
designer, as an example. When I adjusted
Camera Raw’s Grayscale Mix red slider to
bring out the logo on the shirt, the rest
of the image looked like it was shot with
infrared film. I needed to apply the red
adjustment locally.
Starting in 1. Bridge, open the RAW
file into Camera Raw (File→Open in
Camera Raw). Make sure Bridge is host.
In Camera Raw, use the HSL/Grayscale
Mix tab to convert your file to black
and white. I suggest for this version
you use Auto.
Open the Workflow preferences by 2.
clicking on the link at the bottom
of the window (Figure 10-36). In the
Workflow dialog box, select Open in
Photoshop as Smart Objects.
Select Open Object from the bottom ...


