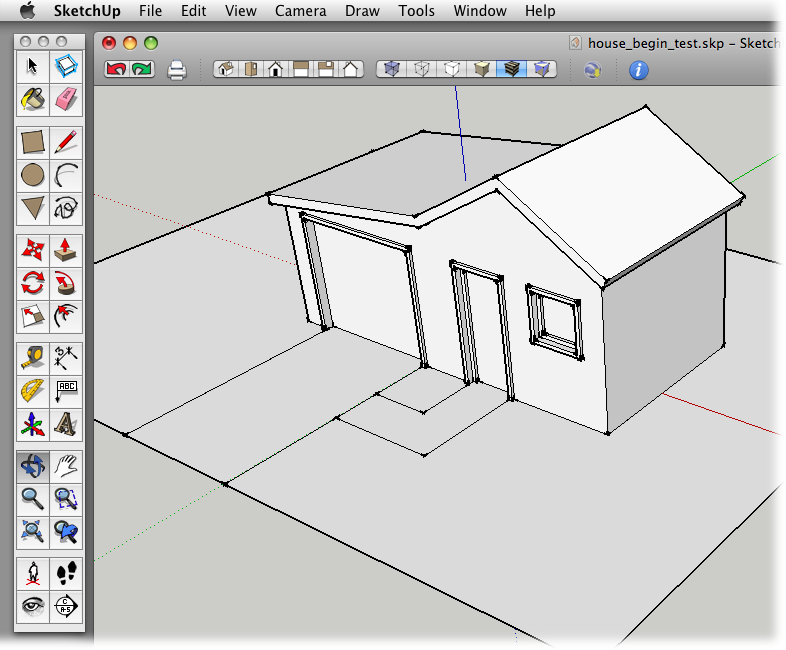
As you add details your model begins to look less like a modified shoebox and more like a real house. Another detail that's important for real houses is a roof with an overhang. The body of the roof holds beams and rafters that support the roof, and the overhang protects the walls and siding from sun and weather. In the real world the laws of gravity and nature seem to have more effect than they do in SketchUp.
In this next exercise, you use the Offset tool to create a profile for your new roof, and then you use Push/Pull to give it shape. The first step is to modify the overall contour of the roof using the Move tool.
Click the roof's left ridgeline, and move it down in along the blue axis.
When you move the ridgeline along the blue axis, you see a dotted blue line and a tooltip message that says "On Blue Axis".
When you see the "On Blue Axis" tooltip, press and hold Shift.
The Shift key locks the movement of the edge to the blue axis.
Click the house's left edge.
The roof flattens, eliminating the ridgeline.
Erase the shared edge.
You no longer need the shared edge that divides the ridgeline; remove it now so it won't interfere with other parts of the model.
Move the outside edge down just a bit.
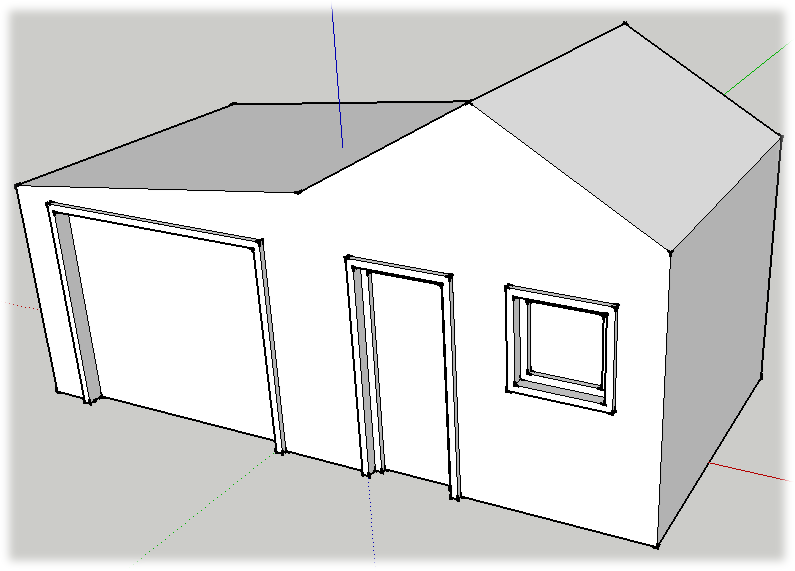
Creating a slight slope here helps drain moisture and gives the building a bit of character, as shown in Figure 4-24.
At the front of the house, select the edges that define the roof's profile.
Your selection should include three lines at the top of the house.
Use the Offset tool to offset the edges up.
You can eyeball this offset, or type dimensions. Something between 6 and 8 inches is appropriate for a roof.
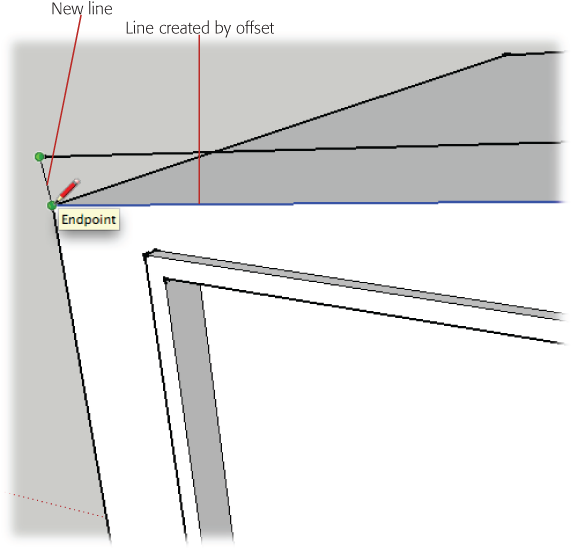
With the Line (L) tool, connect the edges between the original lines and the new lines created by the offset, as shown in Figure 4-25.
You close this new shape by drawing a line on each end. Once the shape is closed, the face fills in.
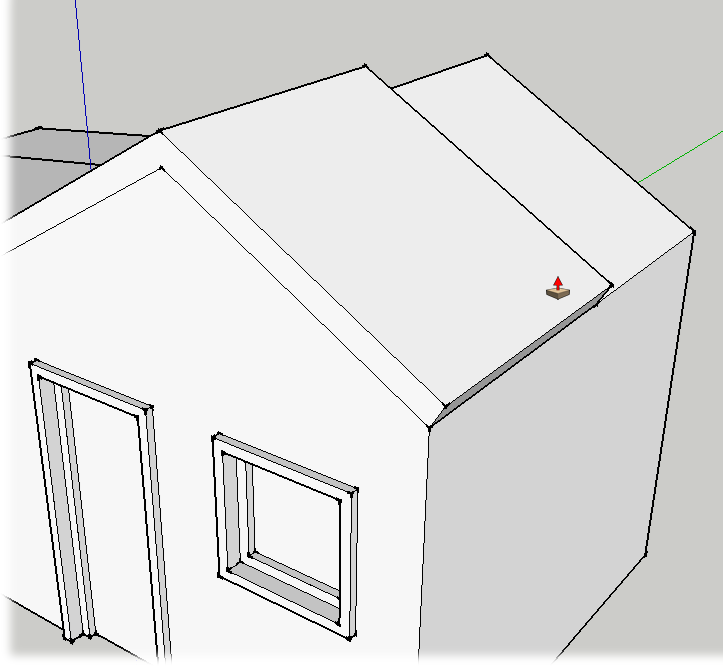
Choose Push/Pull (P), and then push the new outline of the roof back to cover the rest of the house.
Click the new surface once with Push/Pull, and then push it to the back of the building. You can reference one of the back edges to temporarily align the roof with the back of the building.
Pull out the overhang on the front.
Click the front face again, and begin to pull the face forward to create an overhang. A 9- or 10-inch overhang works well, but you can use any dimension you want.
Pull out the overhang on the sides and the back.
The overhang should be the same on all sides of the building. Use the Measurements toolbar to accurately create overhangs of equal dimensions. After you've pulled out all the overhangs, you may notice that the process leaves some extraneous lines.
Note
You can't just double-click to repeat the overhang distance. This is due to SketchUp's interior (white) and exterior (blue) face issues. For more details, see Double-Clicking with Push/Pull.
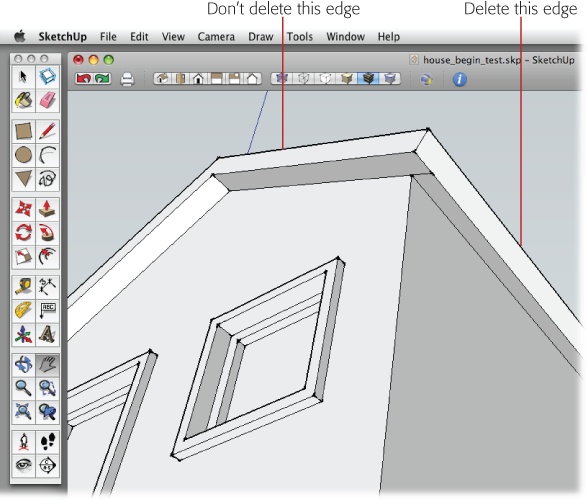
Change your view so you can see the bottom of the overhang, and then erase the extra lines.
As shown in Figure 4-27, delete the shared edges that separate faces on the same plane. Don't delete the edges where the roof changes angle; that also erases the faces.
Orbit (O) around the place and admire your construction skills.
Unless you've gone off on a creative tangent, your model looks something like the house in Figure 4-28. You'll take care of the initial landscaping in the next few steps.
Get Google SketchUp: The Missing Manual now with the O’Reilly learning platform.
O’Reilly members experience books, live events, courses curated by job role, and more from O’Reilly and nearly 200 top publishers.
