Use XML Maps
If all of the XSLT in the preceding sections intimidated you, relax a bit. Excel also provides graphical tools for importing XML into workbooks through XML maps . To see how this works, follow these steps:
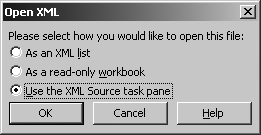
Open the sample file SimpleOrder.xml in Excel using the regular File → Open menu item. Excel displays the Open XML dialog box (Figure 15-5).

Figure 15-5. Step 1: open the XML file
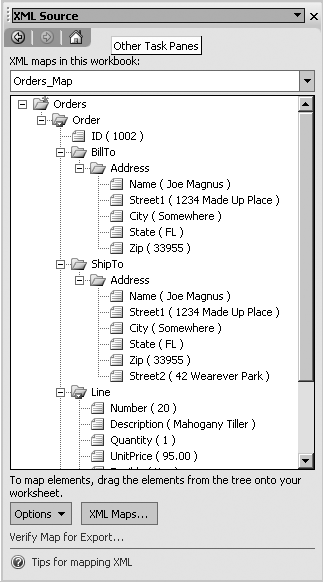
Select the “Use the XML source task pane” option and click OK. Excel creates a new, blank workbook and informs you that the file did not contain a schema, so Excel will infer one from the XML. Click OK. Excel displays the XML map it created in the task pane (Figure 15-6).

Figure 15-6. Step 2: create an XML map
Import XML nodes into a worksheet by selecting the nodes in the XML map and then dragging them onto a worksheet. Excel creates these new items as a list, so use multiselect to include multiple items in one list as shown in Figure 15-7.
Click Refresh XML Data to import the data from the XML file into the list as shown in Figure 15-8.
This tutorial works well for the summary information imported here. The order ID, name, subtotal, tax, and due nodes occur once per order. You can sort the list, filter it to see only a specific order ID, and so on. However, if you want to include the detail lines ...
Get Programming Excel with VBA and .NET now with the O’Reilly learning platform.
O’Reilly members experience books, live events, courses curated by job role, and more from O’Reilly and nearly 200 top publishers.

