E X T R A C R E D I T
These last few steps are fi nicky and deal with tiny details in the artwork. But
that’s what Illustrator’s all about, right? Besides, it’s the only place in this
lesson you’ll learn about the stroke options beyond simple weight as well
as Illustrator’s isolation mode, which is critical for working in artwork with
an overabundance of shapes. Finally, I wrap up with a special treat
—
a very
cool pattern fi ll based on, of all things, a nose. How could you pass that up?
13.
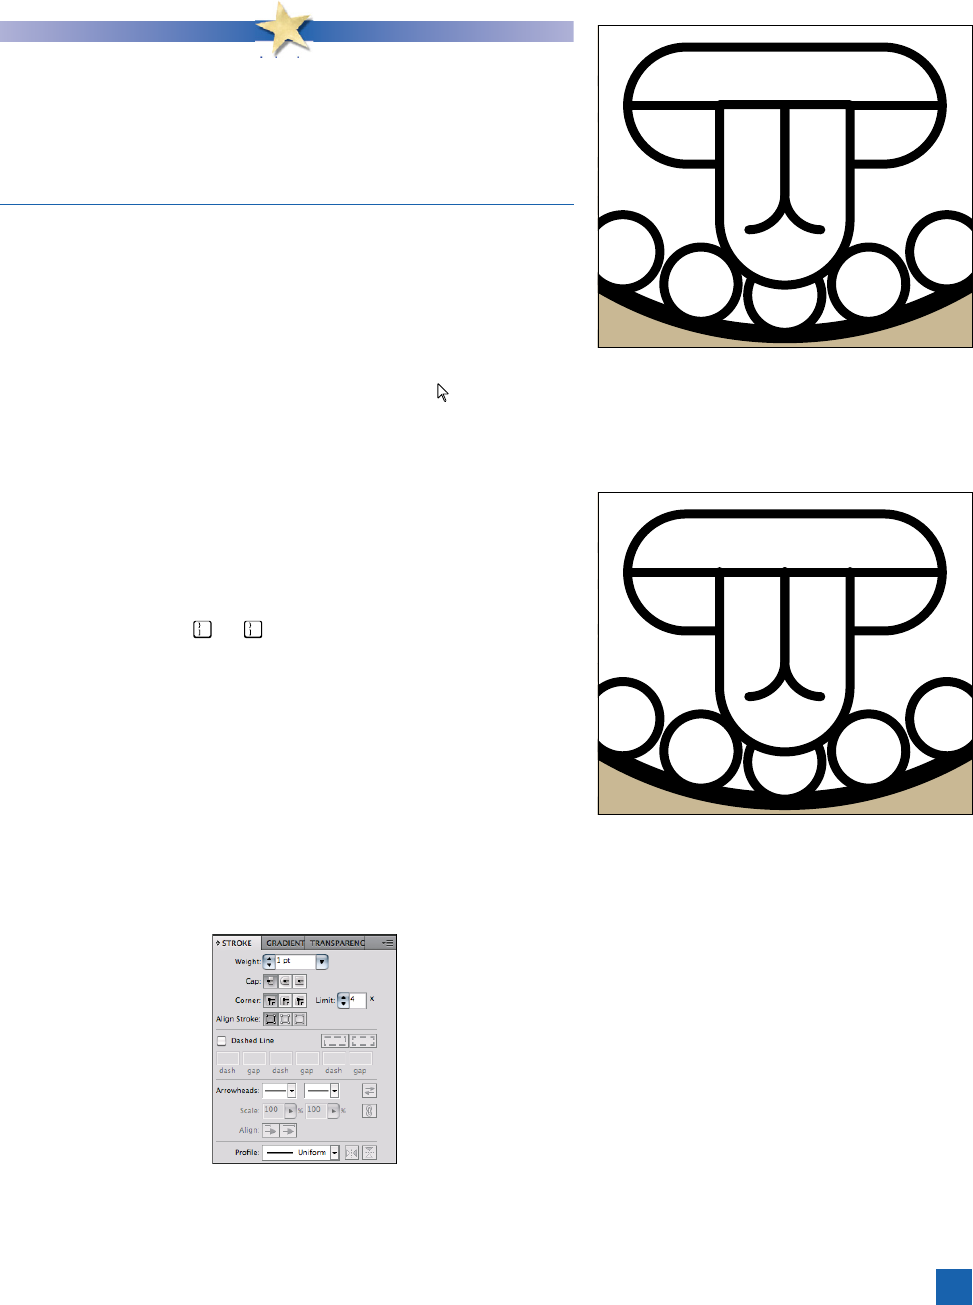
Examine the tongue. Your artwork looks pretty sharp, but if you
look closely at the shapes that make up the tongue (enlarged in
Figure 2-94), you’ll see some alignment issues at the top, along
the seam of the lips. (Try a zoom level of 1600 percent to get
the necessary level of detail.)
14.
Delete the top line of the tongue. Select the tool from the
toolbox, or press the A key. Click the top line of the tongue—
but not on one of the corner points—to select that line segment,
and press the Delete key.
15. Bring the lip seam to the front. That’s better, but now the fi ll
of the tongue is hiding part of the seam of the lips. Switch to
the black arrow tool and click (or alternately, just Alt-click or
Option-click with the current white arrow tool) the seam to se-
lect it. Press Ctrl+ (- on the Mac) to bring the seam over
the tongue, as shown in Figure 2-95.
16. Bring up the Stroke panel.


