17.
Align the spiral to the thumb. Chances are good that your art, like that in
Figure 5-13, doesn’t quite line up. With the black arrow tool, select the spiral,
and drag it until it snaps into alignment with the thumb (most likely, just a
fraction of a point).
Unlike earlier versions of Illustrator, CS5 uses smart guides, so you don’t necessarily have
to grab the path by an anchor point; the path will snap into place without a point to act
as an anchor.
Figure 5-14 . Figure 5-15 .
18.
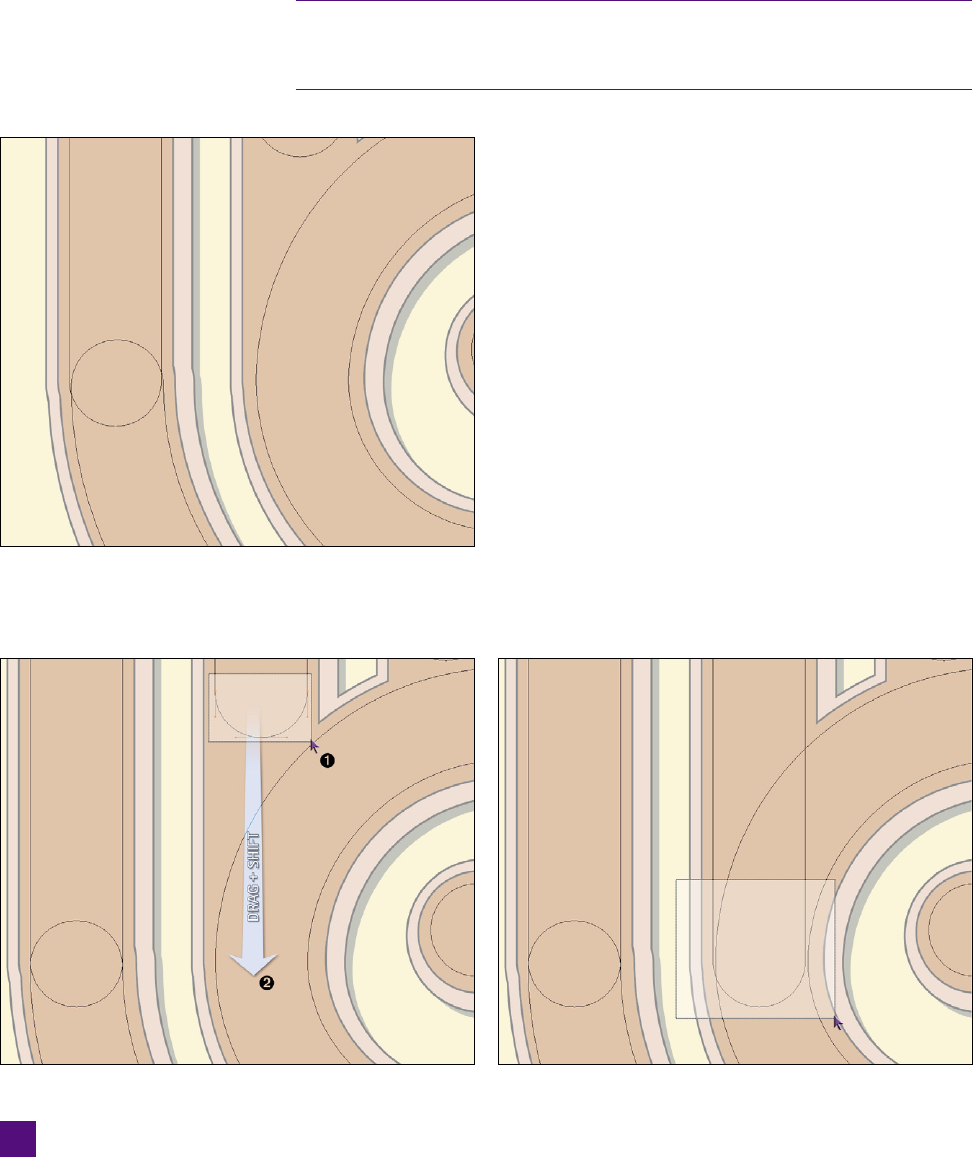
Extend the index fi nger to intersect the spiral. Switch
to the white arrow tool by pressing the A key, and
marquee around the bottom curve of the index fi nger
to select just those points, as shown in Figure 5-14.
Drag those points until they align with the bottom
of the thumb, adding the Shift key to constrain the
movement to vertical.
19.
Nudge the curve of the spiral into alignment. Once
again, the spiral is out of alignment; this time with
the index fi nger. You need to select some of the points
on the spiral to move them; marquee the area shown
in Figure 5-15 to select the necessary points.
Unfortunately, that also selected some of the points of
the fi nger, which you don’t want to move. Shift+Alt-
click (or Shift-Option-click) the index fi nger once to
add the entire shape to the selection, and Shift+Alt-
click (Shift-Option-click) again to deselect the entire
Figure 5-13 .
144
Lesson 5: Transform ...


