path. Then, using the arrow keys, nudge the spiral
into alignment.
24.
Zoom out and select all the shapes. Now that every-
thing’s aligned properly and your shapes are overlap-
ping, zoom back out so you can see the full artwork.
Select all the shapes by pressing Ctrl+A (-A).
25.
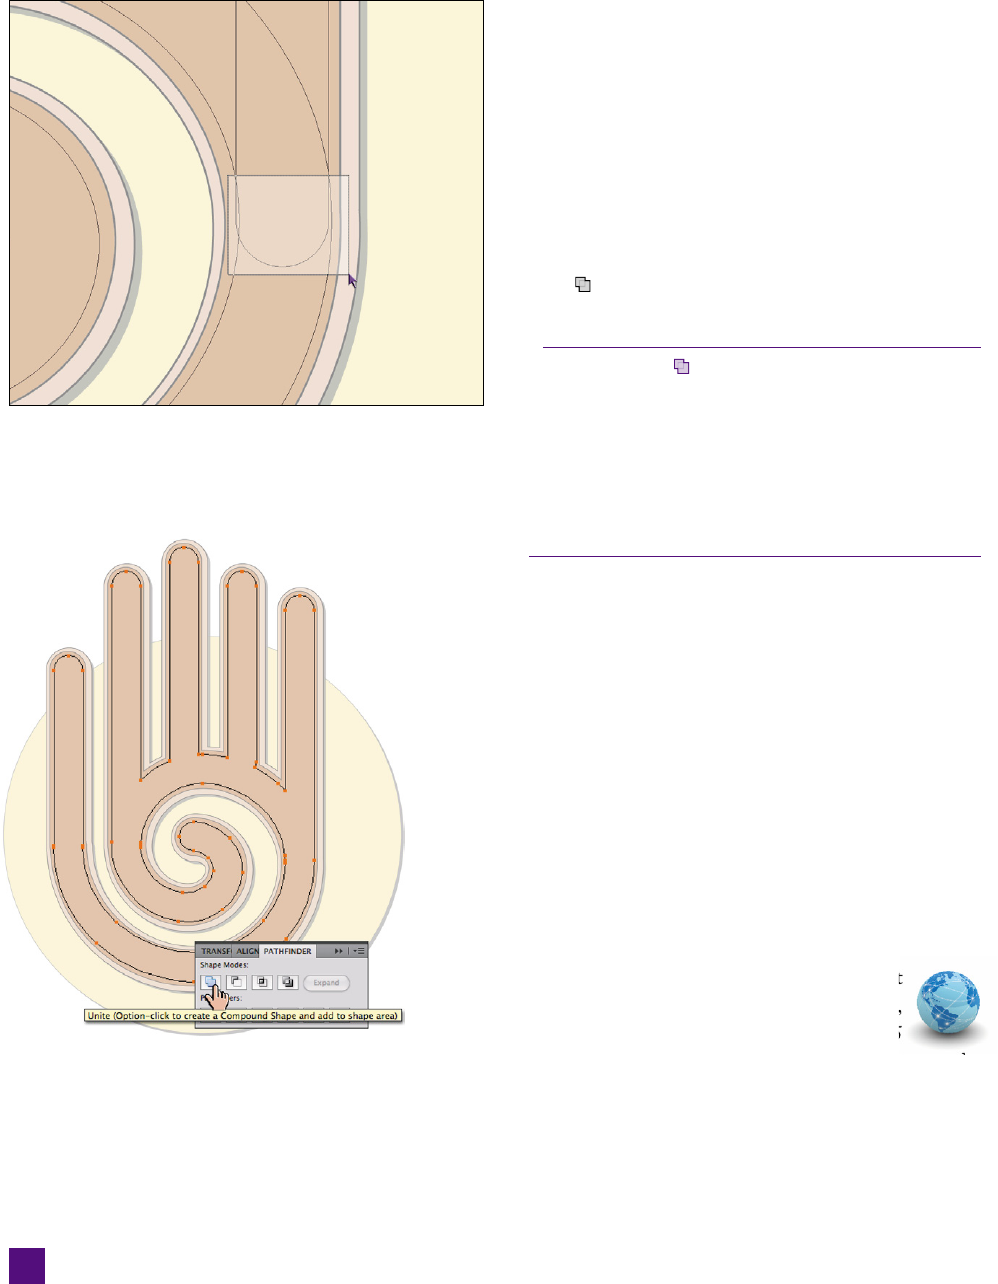
Join the shapes with the Pathfi nder panel. Bring
up the Pathfi nder panel by pressing Ctrl+Shift+F9
(-Shift-F9) or choosing Window➝Pathfi nder. Click
the icon to join (or unite) the shapes into a single
fi lled path, as shown in Figure 5-20.
After you click , you should see one single outline
with no points left inside the shape. If your shapes look
unchanged, however, not to worry
—
Illustrator joined
them into a compound path, that is, a path made up of
multiple shapes, rather than a new single path. Simply
click the Expand icon in the Pathfi nder panel to complete
the step. I discuss the Pathfi nder panel fully in the next
lesson.
Figure 5-20 .
Figure 5-19 .
The hand is now complete, and you accomplished all those steps
without using a single drawing tool. Save your work because in the
next exercise you’ll be returning to it to put the fi nishing touches
on your stop sign.
Offsetting Paths to Simulate Depth
In the last exercise, you used various transformations to create
the basic shapes of the stop sign. But Illustrator has still more
transformations in store. In this exercise,


